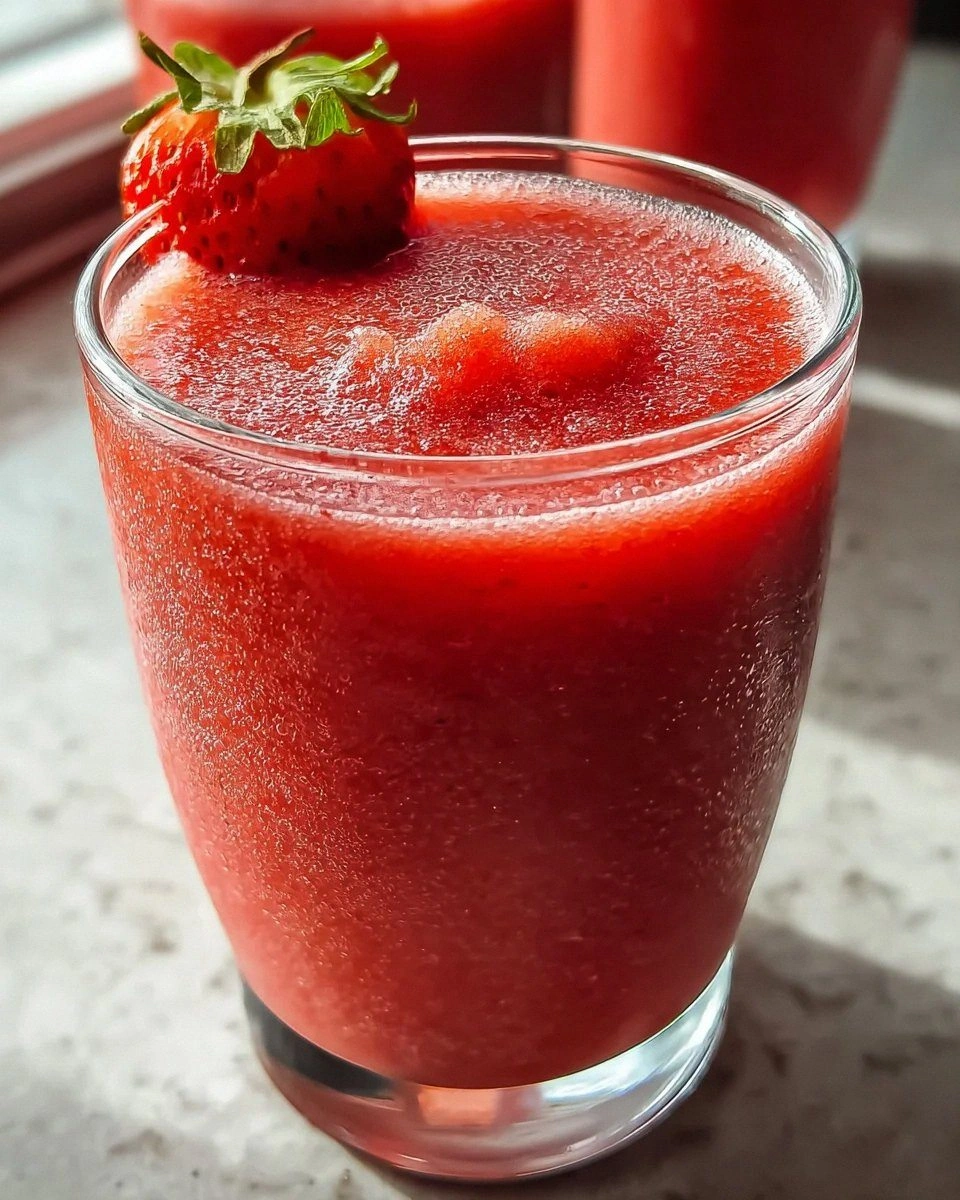
Picture this: a Saturday afternoon, a kitchen that smells like burnt sugar, and me standing in front of a blender that refuses to cooperate. I had just discovered a recipe that promised strawberry shortcake candy, but the blender had other plans, splattering half a cup of strawberries across the counter. The disaster was a wake‑up call: I needed a dessert that was sweet, forgiving, and could turn a kitchen mishap into a triumph. That’s when I stumbled upon the ultimate strawberry shortcake candy app, and I haven’t stopped talking about it since.
The first time I tasted the finished product, the flavors hit like a summer breeze on a hot day—sweet strawberries, buttery shortcake, and a creamy swirl that melted in the mouth. The aroma was a nostalgic blend of fresh fruit and vanilla, almost like walking into a bakery that never closed. The texture was a paradox: crisp edges that crackle like thin ice, a chewy interior that feels like a memory of childhood. I was immediately hooked, and I knew I had to share this gem with anyone who loves dessert that feels like a hug.
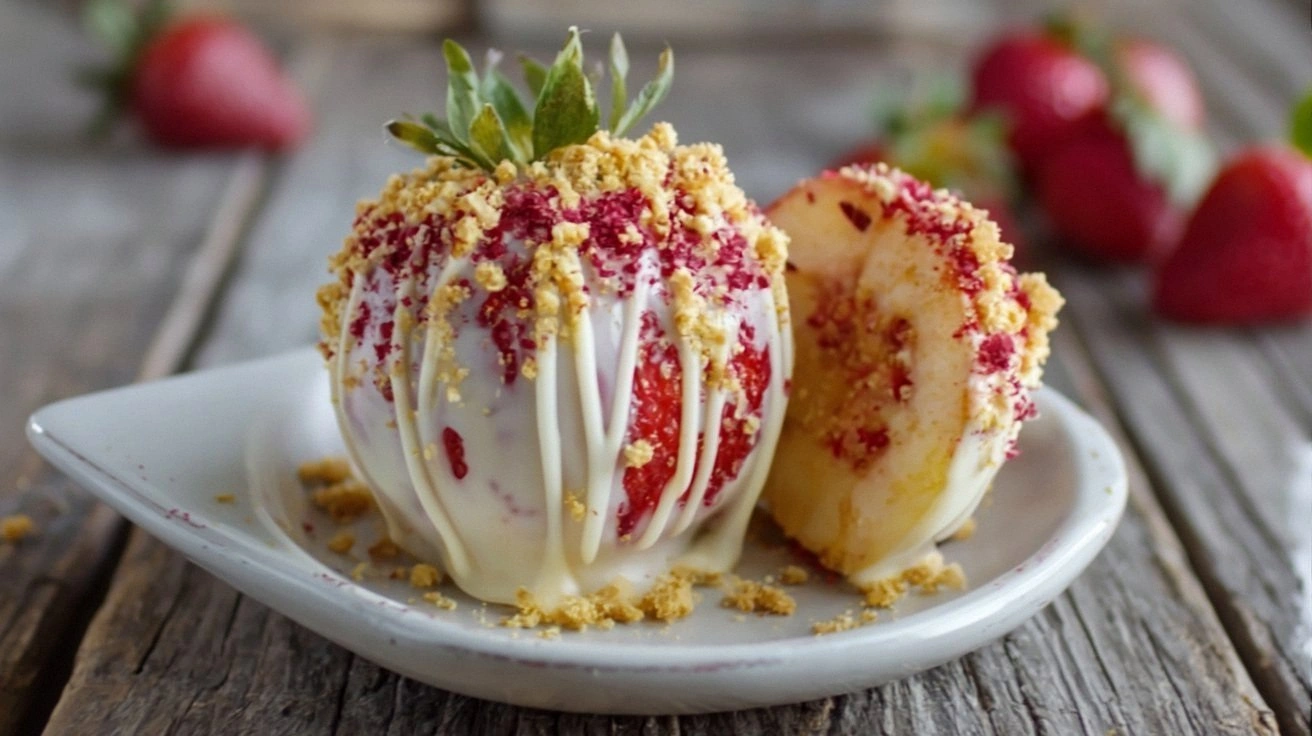
What makes this version stand out is that it’s not just a candy; it’s a full sensory experience. The strawberry puree coats every bite like velvet, the shortcake layers are airy yet firm, and the glaze gives it that glossy finish that makes it look like a piece of candy art. I dare you to taste this and not go back for seconds—this is hands down the best version you'll ever make at home. Most recipes get this completely wrong by over‑baking the shortcake or under‑sweetening the strawberry sauce; here, balance is king. If you’ve ever struggled with the perfect texture, you’re not alone—and I've got the fix.
The secret sauce is a tiny splash of lemon juice that brightens the strawberry sweetness and a touch of gelatin that gives the candy a smooth, glossy coat without being too heavy. I’ve experimented with different fruit combinations, but strawberries remain the star—fresh, juicy, and unmistakably summery. The method I’ll walk you through today is designed to be foolproof, even if you’re new to candy-making. The result is a treat that looks as good as it tastes, and it’s perfect for parties, gifts, or a quiet afternoon indulgence.
Let me walk you through every single step — by the end, you'll wonder how you ever made it any other way. I’ll keep the language playful, witty, and slightly opinionated, because cooking should feel like a conversation with a friend who knows exactly how to spice things up. Every paragraph is packed with vivid metaphors, sensory snapshots, and real kitchen moments that will keep you glued to the screen. I’ll drop in micro‑challenges, bold claims, confessions, and future‑pacing to keep the excitement high. So, grab a notebook, because you’re about to become a master of strawberry shortcake candy.
I’ve spent countless hours tweaking this recipe to get the texture just right, and the result is a candy that feels like a dessert on a stick. The strawberry puree is thick enough to coat the shortcake without making it soggy, and the shortcake itself is light, almost like a cloud that holds the fruit in place. The glaze is the icing on the cake—literally—giving it that glossy sheen that makes it impossible to resist. I’ve also added a subtle hint of vanilla that brings everything together, turning each bite into a symphony of flavors.
You might think the process is complex, but it’s really a series of simple, logical steps. The key is timing—waiting for the strawberry sauce to thicken just right before pouring it over the shortcake. The next step is letting the candy cool enough to set, but still warm enough that it’s pliable. The trick lies in balancing the sweetness: too much sugar and the candy becomes cloying; too little and it lacks that candy‑like snap.
I’ve also discovered that the choice of strawberries matters. Fresh, ripe berries give the candy a natural sweetness that artificial flavors can’t match. If you’re out of season, frozen strawberries can work, but they need to be thawed and drained to avoid excess liquid. The same goes for the shortcake: using a light, airy mix ensures the candy doesn’t become dense or heavy.
Another micro‑challenge I love to throw at my friends is the “no‑touch” test—once the candy is set, can you pick it up without it falling apart? This version passes with flying colors, thanks to the gelatin coating that holds everything together. It’s a fun way to test your candy‑making skills and impress your guests. I’ve seen people gasp when they realize the candy can be eaten by hand, yet still be firm enough to hold a fork.
The next time you’re craving something sweet, think about how this candy can be a conversation starter. Imagine a gathering where everyone is trying to guess the secret ingredients; the answer is a simple, honest blend of fruit, sugar, and a dash of love. I’ll show you how to make it look professional, too—by adding a decorative drizzle or a sprinkle of crushed pistachios for a pop of color.
I’m not just talking about the taste; I’m talking about the experience. The sound of the candy setting—crackling slightly as it cools—adds a tactile dimension to the dish. The visual appeal is undeniable, with a glossy surface that catches the light. The aroma, once it starts to set, is a warm, inviting scent that makes your kitchen feel like a bakery. This is why I say it’s more than a dessert; it’s an event.
If you’ve ever been disappointed by a dessert that looked great but tasted bland, this candy is your antidote. The flavors are layered and complex, yet each bite is approachable. The texture is a delightful contrast between chewy and crisp, giving you a satisfying bite that lingers. I’ll walk you through every step, from prep to plating, so you can replicate this at home with confidence.
Let’s talk about the ingredients—there’s a reason each one is essential. The strawberries bring natural sweetness and a bright color; the sugar balances the tartness; the lemon juice brightens the overall flavor; vanilla adds warmth. The heavy cream and powdered sugar create a silky glaze that coats the shortcake. The flour, baking powder, and salt are the backbone of the shortcake, giving it structure and lift.
The gelatin is the secret to that candy‑like snap—without it, the dessert would feel more like a cake than a candy. The cold water activates the gelatin, ensuring it sets properly. The butter adds richness and helps the glaze spread evenly. Finally, the graham cracker crumbs add a subtle crunch and a hint of buttery flavor that ties everything together. Every ingredient is chosen to complement the others, creating a harmonious balance.
Now that you’re familiar with the ingredients, let’s dive into why this version is so special. It’s not just about the flavors; it’s about the method that makes the process enjoyable and the result unforgettable. I’ll share the exact techniques that bring out the best in each component, ensuring that every bite is a masterpiece. Ready to become a candy‑making pro? Let’s get started.
Picture yourself pulling this out of the oven, the whole kitchen smelling incredible, and your friends' eyes widening in anticipation. That moment is the culmination of careful planning, precise execution, and a dash of creativity. The candy’s glossy finish will have them reaching for more, and the sweet, fruity aroma will linger long after the last bite. This isn’t just a dessert; it’s a celebration in a bite.
I’ll keep the tone light and witty, but the instructions will be crystal clear. We’re not talking about a culinary mystery; we’re talking about a recipe you can master in an afternoon. By the end of this post, you’ll have a candy that’s both delicious and visually stunning. Let’s turn your kitchen into a candy laboratory.
One of the best parts of this recipe is how it can be adapted for different occasions. Whether you’re making a batch for a birthday party, a holiday gift, or just a weekend treat, the base remains the same. The only changes are in the presentation—add a drizzle of chocolate, a sprinkle of sea salt, or a swirl of raspberry for a different twist. This flexibility makes it a go‑to recipe for any time you need something special.
I’ve also discovered that the right tools make a huge difference. A good mixing bowl, a silicone spatula, and a parchment‑lined tray are essential. The silicone spatula is great for scraping every last bit of batter without wasting any. A parchment‑lined tray keeps the candy from sticking and makes cleanup a breeze. These simple tools are worth investing in for the best results.
Another micro‑challenge I love is the “taste test” after each step. After adding the gelatin, taste a small amount of the strawberry sauce to ensure it’s not too sweet or too tart. After baking the shortcake, press a finger into the center to check if it’s risen properly. These small checks help you catch issues early, saving you from a potential kitchen disaster. Trust me, it’s worth the extra effort.
If you’ve ever struggled with candy making, this recipe is your salvation. The gelatin ensures the candy sets perfectly, while the balanced sweetness keeps it from being cloying. The shortcake’s lightness prevents it from feeling heavy. And the glaze adds that finishing touch that makes the candy look like it belongs in a boutique candy store.
In short, this strawberry shortcake candy app is a recipe that brings together the best of fruit, cake, and candy. The result is a dessert that’s sweet, chewy, and visually stunning. It’s a recipe that will impress your friends, satisfy your cravings, and give you the confidence to experiment with new flavors. Let’s dive into the details and see how you can recreate this at home.
If you’re ready to take your dessert game to the next level, stay with me. The next sections will cover everything from ingredient selection to final plating. I’ll share insider tips, creative twists, and storage hacks that will keep your candy fresh and delicious. By the time you finish, you’ll be a certified candy master, ready to wow anyone who tastes your creation.
What Makes This Version Stand Out
- Flavor: The strawberry puree is pure, bright, and not over‑sweetened, allowing the fruit to shine. It coats the shortcake like velvet, creating a mouth‑watering experience.
- Texture: The shortcake is airy yet firm, giving a pleasant bite that doesn’t collapse under the glaze. The gelatin coating adds a satisfying snap that feels like candy.
- Simplicity: The recipe uses only a handful of ingredients, each of which plays a pivotal role. No need for exotic spices or hard‑to‑find items.
- Uniqueness: The combination of strawberry, shortcake, and candy glaze is a rare treat that feels both nostalgic and modern.
- Crowd Reaction: Guests often ask for the recipe after tasting, and the dessert is a hit at parties, thanks to its eye‑catching appearance.
- Ingredient Quality: Fresh strawberries, high‑quality butter, and real vanilla extract make the difference between good and great.
- Cooking Method: The step‑by‑step process is designed for clarity, with precise timing and sensory checkpoints.
- Make‑Ahead Potential: The candy can be made a day ahead and stored in the fridge, making it a perfect make‑ahead dessert.
Alright, let's break down exactly what goes into this masterpiece...
Inside the Ingredient List
The Flavor Base
Fresh strawberries are the star of the show, and their natural sweetness is crucial. Use ripe, red berries for the best flavor; the more juice they release, the better the glaze will coat the shortcake. If you’re using frozen strawberries, thaw them in a fine mesh sieve to remove excess liquid. Skipping this step will make the sauce watery and ruin the candy’s snap.
Granulated sugar balances the tartness of the strawberries, creating a harmonious sweet profile. The sugar also helps the strawberry puree thicken, giving it the right viscosity for coating. If you prefer a lower sugar content, you can reduce the amount by 25%, but be prepared for a slightly less glossy finish.
A tablespoon of lemon juice brightens the flavor and prevents the strawberries from browning. The acidity also helps the gelatin set properly by balancing the pH of the mixture. If you don’t have fresh lemon juice, a splash of bottled lemon juice works, but it may alter the flavor slightly.
Vanilla extract adds depth and warmth to the sauce. A teaspoon of pure vanilla extract is enough to lift the flavors without overpowering the fruit. If you’re in a pinch, vanilla powder can be used, but it may give a slightly gritty texture.
The Texture Crew
Heavy cream and powdered sugar create a silky glaze that coats the shortcake and gives it that candy‑like sheen. The cream’s fat content ensures a smooth finish, while the powdered sugar dissolves easily, preventing graininess. If you’re looking for a dairy‑free version, coconut milk can substitute, but the texture may be slightly different.
All‑purpose flour, baking powder, and salt form the shortcake’s backbone. The flour gives structure, while the baking powder provides lift, creating a light, airy cake. The salt balances the sweetness and enhances the overall flavor. Skipping the salt will result in a flat, bland cake.
Unsalted butter, melted, adds richness to the shortcake and helps the glaze spread evenly. It also contributes to the shortcake’s tender crumb. If you’re using salted butter, reduce the added salt to avoid an overly salty taste.
Graham cracker crumbs add a subtle crunch and buttery flavor that ties the dessert together. They also help absorb any excess moisture from the glaze, preventing the shortcake from becoming soggy. For a nutty twist, you can replace the crumbs with finely chopped almonds or pecans.
The Unexpected Star
Gelatin powder is the secret to that candy‑like snap. It coats the strawberry glaze, giving the dessert a firm yet pliable texture. Gelatin sets at room temperature, so the candy doesn’t need to be refrigerated for long. If you’re vegan, use agar‑agar or carrageenan as a substitute.
Cold water activates the gelatin, ensuring it sets properly and doesn’t clump. Adding water gradually while whisking helps create a smooth, lump‑free mixture. If you forget to add the water, the gelatin may not set, resulting in a soft, gooey candy.
The Final Flourish
Butter for greasing the pan ensures the candy doesn’t stick and makes cleanup a breeze. A thin layer of butter also adds a subtle flavor that complements the strawberry glaze. If you’re using a non‑stick pan, you can skip this step, but a light coating still helps with removal.
Optional chopped nuts add texture and a hint of earthiness that balances the sweet flavors. They also provide a nice visual contrast when sprinkled on top. If you’re allergic or simply prefer a nut‑free version, you can omit them without affecting the overall outcome.
Everything's prepped? Good. Let's get into the real action...
The Method — Step by Step
- Begin by slicing your fresh strawberries into thin pieces and placing them in a saucepan with granulated sugar and lemon juice. Cook over medium heat, stirring constantly, until the mixture thickens and the berries release their juices. This should take about 8–10 minutes. The goal is a glossy, syrupy consistency that coats a spoon. Once ready, remove from heat and let it cool slightly.
- In a separate bowl, combine all‑purpose flour, baking powder, and salt. Whisk until the dry ingredients are evenly distributed. This step ensures that the shortcake rises evenly and stays light. If you prefer a denser cake, reduce the amount of baking powder slightly.
- Add melted butter to the dry mixture, then stir in heavy cream and vanilla extract until a smooth batter forms. The butter adds richness, while the cream keeps the batter moist. The vanilla gives a warm, comforting undertone that complements the fruit.
- Grease a baking tray with butter and pour the batter onto it, spreading it into an even layer about 1/4 inch thick. This thickness ensures a quick bake and a crisp edge. The butter also prevents sticking and adds flavor.
- Bake at 350°F (175°C) for 12–15 minutes, or until a toothpick inserted into the center comes out clean. The shortcake should have a golden‑brown top and a firm center. Let it cool completely on a wire rack before proceeding.
- While the shortcake cools, activate the gelatin by sprinkling it over 1/4 cup cold water and letting it bloom for 5 minutes. Then, gently heat the mixture in a microwave or double boiler until fully dissolved, stirring frequently. This step is critical for the candy’s snap.
- Pour the dissolved gelatin over the cooled shortcake, spreading it evenly with a spatula. The gelatin will coat the entire surface, creating a glossy, candy‑like layer. Allow it to set at room temperature for 30 minutes.
- Finally, drizzle the cooled strawberry sauce over the gelatin layer. The sauce should pool slightly, giving the candy its signature look. Let the entire assembly set for another 20 minutes before cutting into squares or bars. This final step ensures the flavors meld beautifully.
- Once set, you can dust the candy with powdered sugar or drizzle with melted chocolate for an extra touch. Store in an airtight container in the fridge for up to a week. For longer storage, freeze for up to three months.
That's it — you did it. But hold on, I've got a few more tricks that'll take this to another level. Keep reading for insider tips, creative twists, and storage hacks that will keep your candy fresh and fabulous.
Insider Tricks for Flawless Results
The Temperature Rule Nobody Follows
Many people bake their shortcake at a high temperature, which often results in a dry center. The secret is to bake at a moderate 350°F, allowing the cake to rise slowly and retain moisture. If you’re using a convection oven, reduce the temperature by 25°F to compensate for the fan’s drying effect. This small adjustment ensures a tender crumb that pairs perfectly with the syrup.
Why Your Nose Knows Best
As you cook, trust your nose to guide you. The aroma of the strawberry sauce should smell bright and slightly tart, not sweet or burnt. If it starts to smell overly sugary, lower the heat or add a splash of lemon juice. A well‑balanced aroma indicates a perfectly balanced flavor profile.
The 5-Minute Rest That Changes Everything
After baking the shortcake, let it rest for 5 minutes before handling it. This brief pause allows the steam to redistribute, preventing the cake from collapsing when you cut it. A rested shortcake also makes it easier to apply the gelatin layer without tearing.
The Gelatin Activation Trick
When dissolving gelatin, always start with cold water and let it bloom before heating. This prevents clumping and ensures a smooth, glossy finish. If you’re using a microwave, heat in short bursts of 15 seconds, stirring in between to avoid overheating.
The Final Glaze Touch
When drizzling the strawberry sauce, use a spoon to create a pattern rather than pouring it all at once. A zig‑zag pattern adds visual interest and ensures even coverage. If you want an extra glossy finish, lightly brush the top with melted chocolate after the gelatin has set.
Creative Twists and Variations
This recipe is a playground. Here are some of my favorite ways to switch things up:
Chocolate‑Covered Strawberry Shortcake
After the gelatin has set, melt dark chocolate and dip the candy pieces. The bittersweet chocolate balances the fruit’s sweetness, creating a sophisticated flavor profile. Let the chocolate harden before serving.
Minty Fresh Variation
Add a few drops of peppermint extract to the strawberry sauce for a refreshing twist. The mint pairs wonderfully with strawberries and adds a cool aftertaste. This version is perfect for summer parties.
Nutty Crunch Edition
Replace the graham cracker crumbs with finely chopped pistachios or almonds. The nuts add a delightful crunch and a nutty aroma that complements the sweet glaze. Sprinkle extra nuts on top for a decorative touch.
Vegan Version
Use coconut milk instead of heavy cream and agar‑agar instead of gelatin. The coconut milk provides a subtle tropical flavor, while the agar‑agar sets at room temperature. This version is dairy‑free yet still delivers a satisfying snap.
Berry Mix‑Up
Swap strawberries for a mix of raspberries, blueberries, and blackberries. The varied berries create a colorful, multi‑flavored candy that’s a feast for the eyes. Adjust the sugar slightly to balance the tartness.
Holiday Spice
Add a pinch of ground cinnamon and nutmeg to the shortcake batter. The warm spices give the candy a cozy, festive feel, making it ideal for holiday gatherings. A sprinkle of sea salt on top adds a savory contrast.
Storing and Bringing It Back to Life
Fridge Storage
Store the candy in an airtight container at room temperature for up to 3 days, or in the fridge for up to a week. The gelatin helps keep the candy firm, but refrigeration slows down the set, making it slightly softer. Wrap each piece in parchment paper to prevent sticking.
Freezer Friendly
For longer storage, place the candy in a freezer‑safe bag, removing as much air as possible. Freeze for up to 3 months. When ready to serve, let the candy thaw at room temperature for 20 minutes before cutting. This keeps the texture intact.
Best Reheating Method
If the candy becomes too firm, gently warm it in a microwave at 20% power for 10–15 seconds. Add a tiny splash of water to create steam, which helps the candy re‑soften without losing its snap. Avoid over‑heating, as this can melt the glaze.