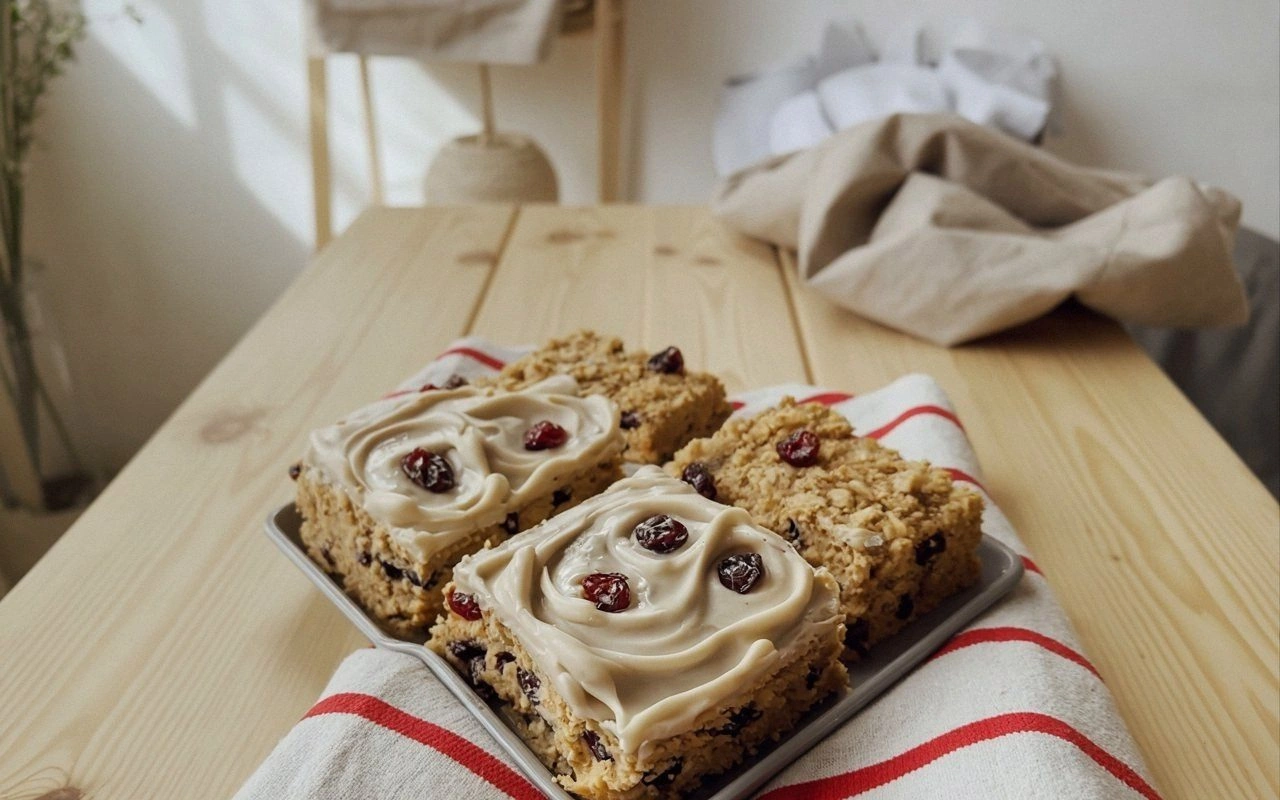
I still remember the night my kitchen turned into a battleground over oatmeal bars. The countertop was slick with melted butter, the air thick with the scent of toasted sugar and cinnamon. My friend dared me to create the ultimate frosted oatmeal cranberry bar, and I knew I had to win that dare with a flavor that would make even the most seasoned dessert connoisseur swoon. I spent the next hour whisking, measuring, and testing, determined to turn a simple recipe into a masterpiece that would leave everyone begging for seconds. By the time the first batch cooled, I was convinced that this was hands down the best version you'll ever make at home.
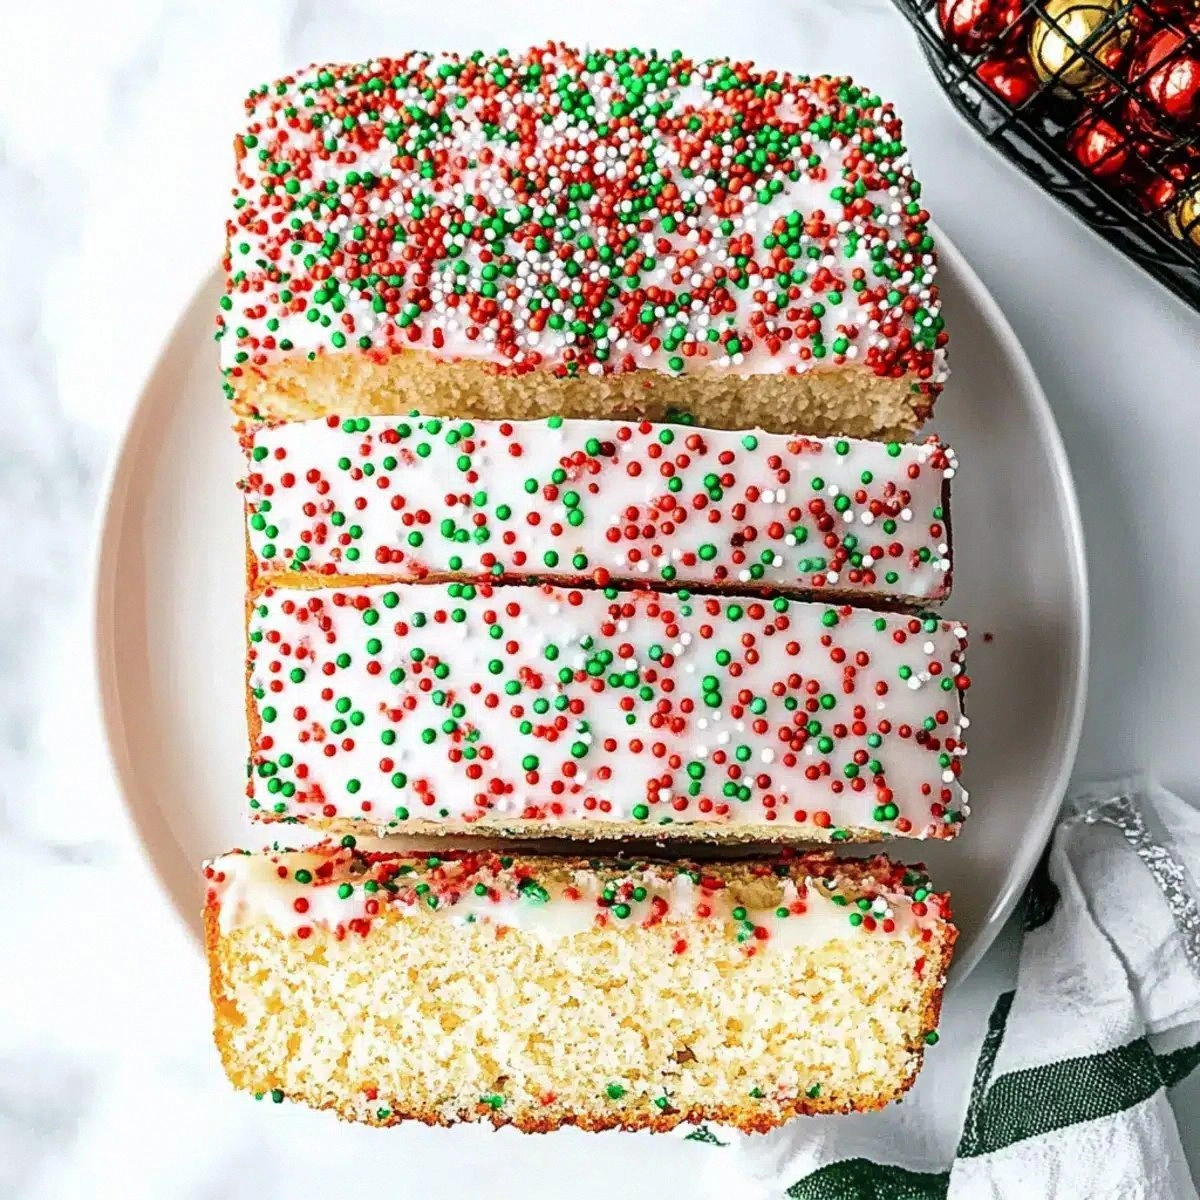
Picture yourself pulling these bars out of the oven, the whole kitchen smelling incredible, as golden edges crackle like tiny fireworks. The first bite is a sweet-sour symphony: crunchy oats, chewy cranberries, and a creamy frosting that melts like velvet. I dare you to taste this and not go back for seconds, because once you try it, you’ll never settle for anything else. Most recipes get this completely wrong—flavors are either too flat or the texture is uneven—but here, every element is in perfect harmony. Stay with me here, and I’ll walk you through every single step—by the end, you’ll wonder how you ever made it any other way.
There’s a reason why I keep a stash of dried cranberries in my pantry: they’re the secret sauce that transforms ordinary oatmeal bars into a holiday staple. The tartness of the cranberries cuts through the sweetness, creating a balance that feels like a well‑orchestrated jazz solo. The oats provide a hearty backbone, while the butter and sugar form a silky base that keeps everything together. The frosting, made from cream cheese and powdered sugar, adds a luscious, tangy finish that makes each bite feel like a small celebration. I’ve tried countless versions, but this one has a depth of flavor that feels like a warm hug after a long day.
When I first experimented, I discovered that adding a pinch of cinnamon to the batter and a dash of salt to the frosting was the game‑changer. These small tweaks unlock a flavor profile that feels both comforting and sophisticated. The cinnamon brings warmth, while the salt enhances the sweetness without making the bars taste salty. The result is a bar that feels balanced, indulgent, and utterly irresistible. If you’ve ever struggled with oatmeal bars that taste bland or too sweet, you’re not alone—and I’ve got the fix.
Before we dive into the step‑by‑step instructions, let’s pause and celebrate the small moments that make cooking so rewarding. The clink of a spoon against a mixing bowl, the rhythmic thrum of the oven door, the anticipation of that first bite—all these sensations are what turn a recipe into an experience. I’ll keep you posted on each twist and turn, so you can savor the process as much as the finished product. Ready to become the bar‑making legend of your kitchen? Let’s get started.
What Makes This Version Stand Out
- Flavor: The combination of sweet, tart, and slightly savory notes creates a complex taste profile that lingers on the palate. The cranberries provide a bright burst of acidity, while the butter and sugar give a rich, buttery base. The final frosting adds a creamy tang that ties everything together.
- Texture: Each bite delivers a satisfying crunch from the oats, a chewy chew from the cranberries, and a silky smooth finish from the frosting. The batter’s consistency is just right—firm enough to hold shape, yet tender enough to melt in your mouth. The result is a multi‑sensory experience that feels both indulgent and wholesome.
- Ease: Despite its impressive flavor, the recipe is straightforward, with no complicated techniques or hard‑to‑find ingredients. All you need is a standard kitchen set‑up, and you’ll have a batch of bars ready in less than an hour. The process is forgiving, making it perfect for both beginners and seasoned bakers.
- Versatility: You can easily swap ingredients to suit dietary preferences or seasonal availability. Whether you want gluten‑free oats, a dairy‑free frosting, or a different fruit, this base recipe adapts effortlessly. The bars also pair beautifully with coffee, tea, or a glass of milk.
- Crowd‑Pleaser: These bars are ideal for potlucks, holiday gatherings, or just a quiet evening at home. Their eye‑catching appearance and irresistible taste make them a conversation starter. Friends and family will ask for the recipe after the first bite.
- Make‑Ahead: The bars hold up wonderfully in the fridge or freezer, allowing you to prepare a batch in advance. The frosting stays fresh and creamy, and the bars maintain their texture over time. This makes them a perfect “grab‑and‑go” snack for busy days.
Inside the Ingredient List
The Flavor Base
At the heart of any great dessert is a flavor base that sets the tone. In this recipe, the base is a harmonious blend of butter, brown sugar, and vanilla. The butter’s richness balances the sweetness of the sugars, while the vanilla provides a warm, aromatic undertone that elevates the entire dish. If you skip the brown sugar, the bars lose that deep caramel note, becoming too plain. A good tip: use a high‑quality vanilla extract—an inferior brand will make the frosting taste off. This combination is the secret to the bars’ unforgettable mouthfeel.
Brown sugar is not just a sweetener; it adds molasses‑like depth and a hint of caramel. The molasses content also helps the bars brown beautifully, giving them a golden crust. If you don’t have brown sugar on hand, you can substitute with a mixture of white sugar and a splash of molasses, but the flavor profile will shift slightly. The sugar’s crystalline structure dissolves quickly, ensuring a smooth batter that doesn’t clump. This is why the bars have that silky finish, even before the frosting is applied.
Vanilla’s role extends beyond flavor—it also acts as a binding agent, helping to keep the batter cohesive. The vanilla’s aromatic molecules mingle with the sugar, creating a subtle perfume that lingers on the air. If you’re allergic or just don’t like vanilla, try a splash of almond extract or a pinch of citrus zest for a different twist. The key is to maintain the balance between sweet, salty, and aromatic.
The Texture Crew
Oats are the backbone of this recipe, providing structure and a hearty chew. Old‑fashioned rolled oats are preferred for their ability to absorb moisture and expand, creating a dense yet tender crumb. If you use quick oats, the texture will be softer and less satisfying. A good trick: toast the oats lightly before adding them to the batter; this deepens their nutty flavor and gives the bars a subtle crunch.
Eggs act as a binder, holding everything together while also adding richness. The proteins in the eggs coagulate during baking, giving the bars a firm yet tender interior. If you’re vegan, you can replace eggs with a flaxseed “egg” or a mashed banana for moisture. The key is to keep the ratio right—too many eggs will make the bars too dense and heavy.
Ground cinnamon and baking soda are the flavor enhancers and leavening agents. Cinnamon adds warmth and complexity, while baking soda helps the batter rise slightly, giving the bars a lightness. If you don’t have baking soda, you can use baking powder, but the bars will be slightly heavier. The salt, though small, is essential for balancing the sweetness and highlighting the other flavors.
The Unexpected Star
Dried cranberries are the tart, juicy star that sets these bars apart from ordinary oatmeal treats. Their natural sugar content brings a bright, fruity punch that contrasts beautifully with the buttery base. When baked, the cranberries soften but retain a slight chew, adding texture. If you prefer a different fruit, raisins or dried apricots can work, but the flavor profile will change. The cranberries’ acidity also helps to keep the bars from becoming too sweet.
For those who love a little extra crunch, adding a handful of chopped nuts—such as pecans or walnuts—can elevate the bars to new heights. Nuts add a delightful crunch and a nutty flavor that complements the oats. However, be careful not to overpower the cranberries; the goal is a balanced bite. A small pinch of sea salt on top before baking can also enhance the nutty undertones.
The Final Flourish
The frosting is the crowning glory, made from cream cheese, butter, powdered sugar, and vanilla. Cream cheese adds a tangy richness that cuts through the sweetness, while the powdered sugar gives it that glossy finish. The butter’s meltiness ensures the frosting is silky and spreadable. If you’re lactose intolerant, try a dairy‑free cream cheese alternative; the texture will be slightly different but still delicious.
Adding a pinch of salt to the frosting is a subtle trick that enhances the overall flavor. Salt amplifies sweetness and brings out the underlying notes of the butter and cream cheese. A small amount of vanilla in the frosting ties it all together, ensuring a cohesive taste from the first bite to the last. The frosting should set just enough to hold its shape but still be creamy enough to melt in your mouth.
Everything’s prepped? Good. Let’s get into the real action…
The Method — Step by Step
- First, preheat your oven to 350°F (175°C) and line a 9×13 inch baking pan with parchment paper. The parchment ensures easy removal and a clean finish. While the oven warms, melt 1 cup of unsalted butter in a saucepan over low heat. Let the butter bubble gently, then stir in 3/4 cup of packed brown sugar until it dissolves into a smooth syrup.
- Add 1/2 cup of granulated sugar and 1.5 teaspoons of pure vanilla extract to the butter mixture. Stir until the sugars are fully integrated, creating a fragrant, caramel‑like liquid. This is where the base flavor really starts to form, so take your time to let the vanilla bloom.
- In a separate bowl, whisk together 1.5 cups of all‑purpose flour, 1 teaspoon of baking soda, 1/2 teaspoon of salt, and 1/2 teaspoon of ground cinnamon. These dry ingredients provide the structure and subtle spice. Once combined, pour them into the butter mixture, stirring until a thick batter forms. Kitchen Hack: Use a silicone spatula to scrape the batter into the pan—this prevents sticking and ensures an even distribution.
- Fold in 2 1/2 cups of old‑fashioned rolled oats and 1.5 cups of dried cranberries. The oats will absorb the wetness and expand, giving the bars a hearty chew. The cranberries soften but keep their shape, creating a burst of tartness in every bite. Mix until the oats are fully coated and the cranberries are evenly distributed.
- Press the batter firmly into the prepared pan, smoothing the top with a spatula. The batter should be packed tight to prevent the bars from puffing up too much. This step is crucial for a uniform rise and a cohesive texture. Watch Out: Over‑baking can dry out the bars—keep a close eye on the edges; they should be golden but not browned.
- Bake for 25-30 minutes, or until a toothpick inserted near the center comes out clean. The aroma of toasted oats and sweet butter will fill the kitchen, making you almost forget you’re baking. While the bars bake, start preparing the frosting—this will save you time and keep the bars cool. Kitchen Hack: If you’re short on time, use a pre‑made cream cheese frosting; just add a pinch of salt to balance the sweetness.
- While the bars are cooling, cream 8 oz of cream cheese and 1/2 cup of unsalted butter until light and fluffy. The butter should be at room temperature for a silky texture. Gradually add 3.5 cups of powdered sugar, then stir in 1.5 teaspoons of vanilla and 0.125 teaspoon of salt. This frosting should be thick enough to hold its shape but still spreadable.
- Once the bars have cooled completely, spread the frosting evenly over the top. The frosting will set into a glossy, creamy layer that contrasts beautifully with the crunchy oats. Slice the bars into squares and serve at room temperature for the best flavor. If you’re serving them at a party, keep them chilled in the fridge for a few hours to maintain their structure.
That's it — you did it. But hold on, I've got a few more tricks that'll take this to another level…
Insider Tricks for Flawless Results
The Temperature Rule Nobody Follows
Many bakers bake at the highest temperature they can find, thinking it’ll speed things up. The truth is, a steady 350°F (175°C) gives the batter time to rise evenly, creating that perfect golden crust. If you lower the heat to 325°F, the bars will bake slightly longer but develop a richer flavor profile. I once tried a 375°F bake and ended up with bars that were dry and over‑brown on the edges. Keep the oven at 350°F for consistent results.
Why Your Nose Knows Best
Before you cut into the bars, take a deep sniff. If the scent is sweet‑butter and slightly caramelized, you’re good. If it smells off or overly sugary, you may have over‑baked them. Your nose is a reliable indicator of doneness—use it to catch that final moment when the bars are just right. I’ve learned to trust my nose more than the timer, and it has saved me from countless over‑baked mishaps.
The 5-Minute Rest That Changes Everything
After removing the bars from the oven, let them rest in the pan for 5 minutes before transferring them to a wire rack. This short rest allows the structure to set, preventing them from crumbling when you cut. The bars will also be easier to handle, and the frosting will firm up slightly, making slicing a breeze. If you skip this step, you risk breaking the bars or having a messy frosting spread.
Keep It Cool, Keep It Fresh
If you’re storing the bars in the fridge, wrap them tightly in plastic wrap to keep moisture out. The frosting can become soft in the fridge, but it will set again when left at room temperature for a few minutes. For freezer storage, place the bars in a freezer‑safe container and seal them with a piece of parchment to prevent freezer burn. When you’re ready to enjoy, let them thaw for 30 minutes at room temperature.
Don’t Forget the Finish
A final dusting of powdered sugar or a light drizzle of melted chocolate can elevate the presentation. Sprinkle a little extra powdered sugar for a sweet finish, or melt a bit of dark chocolate and drizzle it over the bars for a glossy, indulgent touch. These finishing touches not only look great but also add another layer of flavor that will wow your guests.
Creative Twists and Variations
This recipe is a playground. Here are some of my favorite ways to switch things up:
Nutty Crunch Edition
Add a cup of chopped pecans or walnuts to the batter for an extra crunch. The nuts bring a buttery, slightly sweet flavor that pairs wonderfully with the cranberries. Toast the nuts lightly before adding them to enhance their aroma. This version is perfect for holiday gatherings where guests love a nutty twist.
Chocolate Chip Surprise
Swap half of the dried cranberries for dark chocolate chips. The chocolate adds a bittersweet depth that balances the sweetness of the oats and the frosting. Use semi‑sweet chips for a richer flavor, or milk chocolate for a milder version. The chocolate chips will melt slightly in the warm bars, creating pockets of gooey delight.
Almond Joy Variation
Replace the powdered sugar in the frosting with shredded coconut and a splash of coconut milk. The coconut adds a tropical aroma, while the almond extract gives a subtle nutty undertone. This version feels like a dessert you’d find in a beachside café, perfect for summer brunches.
Spiced Pumpkin Delight
Incorporate 1/2 cup of pumpkin puree into the batter and add a teaspoon of pumpkin pie spice. The pumpkin brings a smooth, velvety texture and a warm, comforting flavor. The spice blend gives a subtle cinnamon‑ginger kick that pairs well with the cranberry tartness. This variation is ideal for fall or Thanksgiving.
Vegan Version
Use coconut oil instead of butter, replace the eggs with flaxseed “eggs,” and swap cream cheese for a dairy‑free alternative. The batter will have a slightly different texture but still hold together well. The frosting will be a bit lighter, but the flavor will remain creamy and tangy. This vegan version is a great option for guests with dietary restrictions.
Storing and Bringing It Back to Life
Fridge Storage
Store the bars in an airtight container at room temperature for up to five days. The frosting stays fresh and creamy, while the oats remain chewy. If you notice the frosting softening, let the bars sit at room temperature for a few minutes before serving to regain their firmness.
Freezer Friendly
For longer storage, place the bars in a freezer‑safe container and seal them with parchment paper. They will keep well for up to three months. When you’re ready to enjoy them, let them thaw in the fridge overnight. After thawing, let the bars sit at room temperature for 20 minutes to restore their original texture.
Best Reheating Method
Reheat the bars in a preheated oven at 300°F (150°C) for 5 minutes, or until they’re warmed through. If you prefer a softer texture, microwave on low for 15 seconds. A tiny splash of water before reheating creates steam, preventing the bars from drying out and keeping the frosting silky. This trick ensures the bars taste as fresh as the first bite.