I remember the night the kitchen became a battlefield: flour dusting the ceiling, a bowl of melted butter that had turned to a thick, golden sludge, and me, armed with a whisk and a stubborn determination to turn a failed churro batch into something spectacular. The churros had come out pale and soggy, the cinnamon sugar coating lost its crunch, and the whole room smelled of disappointment. I stared at the steaming pan, wondering if there was a way to rescue the dough before it became a culinary tragedy. Then, in that moment of culinary crisis, a spark of inspiration lit up—why not fuse the churro’s beloved cinnamon sweetness with the creamy decadence of cheesecake? This idea felt like a culinary alchemy, a promise that the next bite would rewrite the rules of dessert.
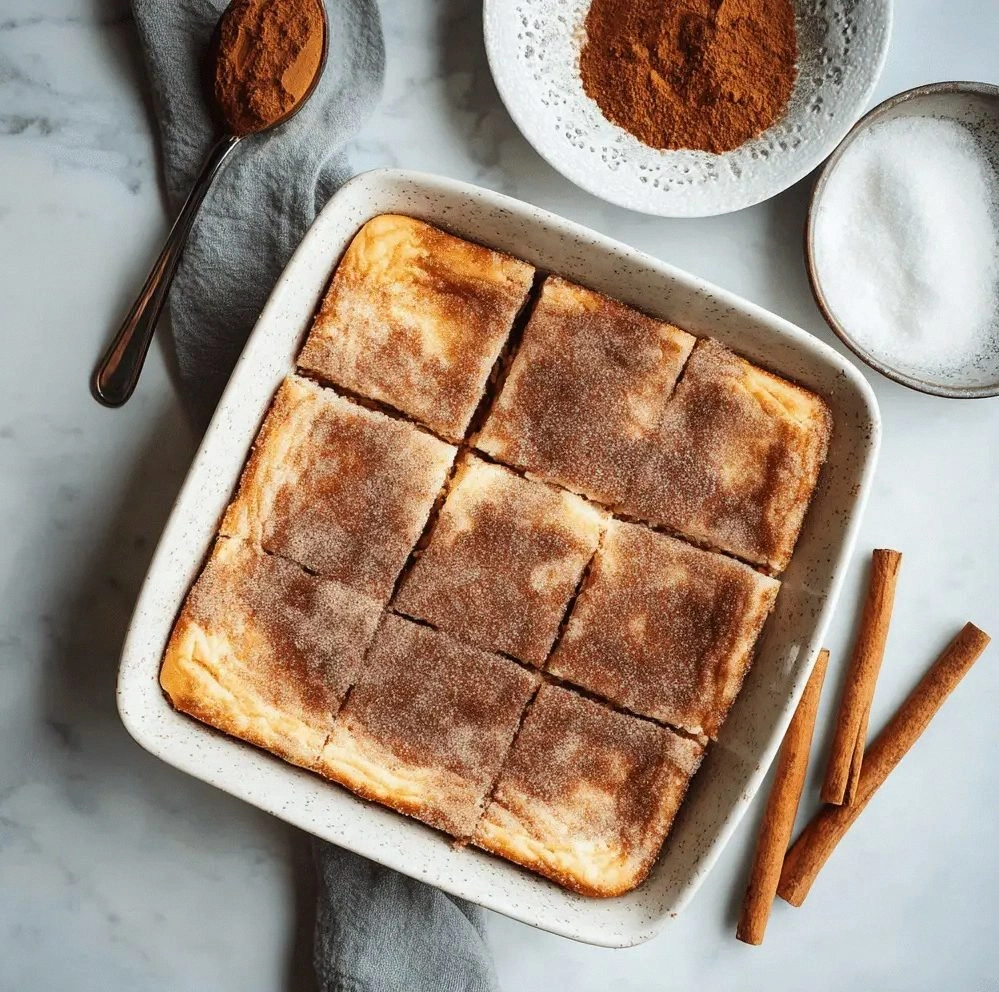
Picture this: a golden, buttery crust that crackles with every bite, followed by a luscious, velvety filling that oozes with subtle hints of vanilla and a whisper of cinnamon. The aroma that fills your kitchen is a warm hug, a comforting scent that makes even the most cynical dessert lover swoon. The texture is a perfect contrast—crisp edges that shatter like thin ice, followed by a silky center that melts in your mouth. The moment you cut into one of these bars, the sound of the crumbly crust gives way to a soft, creamy sigh, a sensory experience that feels like a secret indulgence shared between you and the universe.
What makes this version stand out is that it’s not just a mash‑up; it’s a thoughtfully engineered masterpiece. The churro base is baked to a golden perfection that locks in flavor, while the cheesecake filling is thick enough to hold its shape yet light enough to melt. The combination of textures feels like a dance—crunchy, creamy, and utterly satisfying. And the best part? Every component is sourced from simple pantry staples, so you can whip this up in an hour without breaking the bank. I dare you to taste this and not go back for seconds, because once you experience the harmony of cinnamon and cream, you’ll be hooked.
I’m about to walk you through every single step of this recipe, from the first whisk to the final drizzle. By the end, you’ll wonder how you ever made it any other way. You’ll learn the secrets that keep the bars moist, the tricks that give the crust its signature crunch, and the subtle tweaks that elevate this dessert from ordinary to unforgettable. Let’s dive in and create a dessert that feels like a warm hug in every bite.
What Makes This Version Stand Out
- Flavor: The marriage of cinnamon‑spiced churro dough and silky cheesecake filling creates a layered taste that evolves with every bite.
- Texture: A crisp, buttery crust gives way to a creamy interior that melts in your mouth, offering a delightful contrast.
- Simplicity: Every ingredient is a pantry staple, and the method is straightforward—no advanced techniques required.
- Uniqueness: Few desserts combine churro and cheesecake in a single bar; this recipe is a rare culinary find.
- Crowd Reaction: Friends and family rave about the “double dessert” feel, making it a conversation starter at gatherings.
- Ingredient Quality: Using real cream cheese and fresh cinnamon ensures depth of flavor that processed alternatives can’t match.
- Cooking Method: Baking the crust first and then layering the filling allows each component to shine without interfering.
- Make‑ahead Potential: Once baked, the bars can be stored in the fridge for up to a week, making them perfect for busy schedules.
Alright, let’s break down exactly what goes into this masterpiece. And before we get into the nitty gritty, here’s a quick kitchen hack that will save you time and keep the dough from sticking.
Inside the Ingredient List
The Flavor Base
The foundation of these bars is a churro dough that packs a cinnamon punch. All‑purpose flour, baking powder, and a pinch of salt create the structure, while melted butter and milk provide moisture and richness. The granulated sugar and ground cinnamon give the dough its signature sweet, spiced flavor that echoes classic churros. If you’re craving a deeper cinnamon note, consider adding a dash of nutmeg or a splash of vanilla extract to the dough. Skipping the butter will result in a dry crust, so don’t cut corners here.
The Texture Crew
The cheesecake filling is what gives these bars their creamy allure. Cream cheese is the star—its tang balances the sweetness, and its fat content gives the filling a silky mouthfeel. Sour cream adds a subtle tang and helps stabilize the mixture, preventing cracks during baking. Eggs bind the filling and add structure, while vanilla extract deepens the flavor profile. A small amount of extra flour can be added if the mixture feels too runny, but the balance is delicate; over‑flouring will make the bars dense.
The Unexpected Star
Cinnamon isn’t just for the dough—it’s also sprinkled on top of the finished bars to add a fragrant finishing touch. This layer of cinnamon dusting is essential for that final aroma that lingers long after the last bite. Some adventurous cooks like to drizzle a thin caramel sauce for a sweet, buttery finish, but the bars are delightful even without it. If you’re a cinnamon purist, you can double the amount of ground cinnamon in the dough for an extra kick. Keep in mind that too much cinnamon can overpower the delicate cheesecake.
The Final Flourish
The final flourish is a drizzle of caramel or a dusting of powdered sugar that turns each bar into a visual treat. A light glaze of caramel not only adds a glossy finish but also introduces a caramelized sugar note that complements the cinnamon. If you prefer a lighter touch, a simple dusting of powdered sugar will do the trick, creating a sweet, snowy finish that’s perfect for Instagram photos. The choice is yours, but the key is to add this element at the very end, so it doesn’t melt into the bars during baking.
Everything’s prepped? Good. Let’s get into the real action.
The Method — Step by Step
- Preheat your oven to 350°F (175°C). Line a 9×13-inch baking pan with parchment paper, leaving a few inches of overhang on each side. This will make removing the bars a breeze. While the oven warms, gather all your ingredients for the churro dough.
- In a medium bowl, whisk together flour, baking powder, and salt. Stir in the melted butter, sugar, and cinnamon until the mixture resembles coarse crumbs. Add milk a tablespoon at a time until the dough holds together but isn’t sticky. Roll the dough into small 1‑inch balls and place them on the prepared pan, spacing them evenly. Bake for 5 minutes to pre‑set the crust; this step locks in the crunch.
- While the crust bakes, prepare the cheesecake filling. In a large bowl, beat the cream cheese until smooth and creamy. Add sugar, vanilla, and sour cream, and continue to beat until the mixture is silky. Whisk in eggs one at a time, ensuring each is fully incorporated before adding the next. The filling should be thick but pourable.
- Remove the pan from the oven and let the churro crust cool for 2 minutes. Spoon the cheesecake filling over the crust, spreading it evenly with a spatula. The filling should rise slightly over the crust, creating a layered effect. Return the pan to the oven.
- Bake the bars for 25–30 minutes, or until the edges are set and the center still has a slight wobble. The bars should be lightly golden on top. If you like a crispier top, switch the oven to broil for the last 2 minutes, watching carefully to avoid burning.
- Once baked, remove the bars from the oven and let them cool in the pan for 15 minutes. This cooling period allows the filling to firm up, making cutting easier. After 15 minutes, lift the bars out using the parchment overhang and transfer them to a wire rack to finish cooling.
- When the bars are completely cool, dust them generously with cinnamon or drizzle a thin layer of caramel sauce, if desired. The caramel adds a buttery sweetness that contrasts beautifully with the creamy interior.
- Slice the bars into 1‑inch squares using a sharp knife. For a clean cut, heat the knife in hot water, rinse, and dry before each pass. Store any leftovers in an airtight container in the refrigerator for up to a week.
That’s it — you did it. But hold on, I’ve got a few more tricks that will take this to another level.
Insider Tricks for Flawless Results
The Temperature Rule Nobody Follows
Many people bake at a high heat and then lower it, but the secret is to keep the oven at a steady 350°F. This consistent temperature allows the crust to caramelize slowly while the filling sets without cracking. If your oven runs hot, use an oven thermometer and adjust accordingly.
Why Your Nose Knows Best
When the bars are baking, the aroma is a sign that everything is on track. If you smell a faint, sweet scent of caramel, the crust is ready. A strong, buttery smell means the filling is overcooked. Trust your nose; it’s a reliable guide to perfect bars.
The 5-Minute Rest That Changes Everything
After removing the bars from the oven, let them rest for exactly five minutes before cutting. This short rest allows the filling to set, preventing a soggy mess. I’ve seen bars that were sliced too early crumble and fall apart.
The Right Pan Matters
A 9×13-inch pan is ideal because it gives you enough surface area for even baking. Avoid using a deep pan or a sheet pan, as the bars will be too thick and may not bake through properly. A silicone mat also helps the bars release more easily.
The Final Dusting
A dusting of powdered sugar or cinnamon not only looks pretty but also adds a subtle flavor contrast. If you prefer a sweeter finish, sprinkle a light layer of powdered sugar. For a spicier finish, add an extra pinch of cinnamon.
Creative Twists and Variations
This recipe is a playground. Here are some of my favorite ways to switch things up:
Nutty Crunch
Add chopped pecans or walnuts to the churro dough for a nutty texture. The nuts add a pleasant crunch and a buttery flavor that complements the cinnamon.
Chocolate Swirl
Stir in a few tablespoons of cocoa powder into the cheesecake filling. The chocolate adds depth and turns the bars into a chocolate‑cinnamon delight.
Maple‑Infused
Replace the milk with maple syrup and add a splash of maple extract to the dough. The result is a sweet, aromatic bar that feels like a maple‑infused churro.
Spiced Pumpkin
Incorporate a handful of pumpkin puree into the cheesecake filling and add a pinch of nutmeg. This variation turns the bars into a fall‑season treat.
Lemon Zest
Add lemon zest to the cheesecake filling for a bright, citrusy lift. The lemon balances the richness and adds a refreshing note.
Storing and Bringing It Back to Life
Fridge Storage
Store the bars in an airtight container at room temperature for up to 3 days. Keep them in the refrigerator if you prefer a cooler, firmer texture. The bars maintain their flavor and texture well when properly sealed.
Freezer Friendly
Wrap each bar individually in parchment paper and place them in a freezer bag. They’ll keep for up to 3 months. When you’re ready to enjoy, let them thaw at room temperature for 30 minutes.
Best Reheating Method
Reheat a bar in the microwave on low power for 15–20 seconds, or warm it in a 350°F oven for 5 minutes. Add a tiny splash of water before reheating to keep the filling moist; this trick steams the bar back to perfection.