I was sitting on my couch, half‑asleep, when a sudden craving for something that felt like a campfire wrapped in a latte hit me like a bolt of lightning. I grabbed the nearest coffee mug, stared at the dark brew, and thought, “What if I could bottle that sweet, smoky, marshmallow‑kissed memory into a cold drink?” The idea was half‑madness, half‑genius, and fully destined to become the most talked‑about beverage in my kitchen. I tried a few half‑hearted attempts that ended up tasting like burnt sugar with a side of disappointment, but then I remembered the simple joy of toasting marshmallows over a crackling fire. That memory sparked the game‑changing technique that turned this from a bland experiment into a masterpiece.
Picture this: the scent of freshly brewed dark roast coffee swirling with the deep, earthy notes of cocoa, while a gentle mist of vanilla rises like sunrise fog. The sound of ice cubes clinking in the blender is the percussion section of a symphony, and the moment you pull the toasted marshmallows from the oven, a caramelized crackle fills the air—pure auditory bliss. Your fingertips feel the cool glass, the whipped topping feels like clouds, and the first sip? It’s a warm hug that instantly transports you to a night under a star‑splattered sky, marshmallows melting on your tongue, chocolate dripping down your chin. That’s the sensory overload we’re after, and trust me, it’s addictive.
Most s’mores drinks out there either drown the coffee in too much chocolate or skip the crucial toasted marshmallow crunch, leaving you with a flat, one‑dimensional treat. This version stands out because it balances the bitterness of a strong brew with the silky sweetness of a perfectly whipped marshmallow foam, all while honoring the iconic graham cracker crumble that gives you that nostalgic crunch. I’ve tested it on friends, family, and even my skeptical cat (who, admittedly, just liked the warm milk), and the consensus is unanimous: this is hands down the best version you’ll ever make at home. I dare you to taste this and not go back for seconds.
Okay, ready for the game‑changer? I’m about to walk you through every single step — from the precise moment you toast those marshmallows to the exact temperature you want your coffee to be before blending. By the end, you’ll wonder how you ever settled for any other s’mores drink, and you’ll have a secret weapon that will make you the hero of every brunch, campout, or midnight snack session. Let’s dive in, because this next part? Pure magic.
What Makes This Version Stand Out
- Flavor Harmony: The dark roast coffee provides a robust backbone that doesn’t get lost under the chocolate and marshmallow, while the cocoa adds depth without bitterness, creating a balanced flavor orchestra.
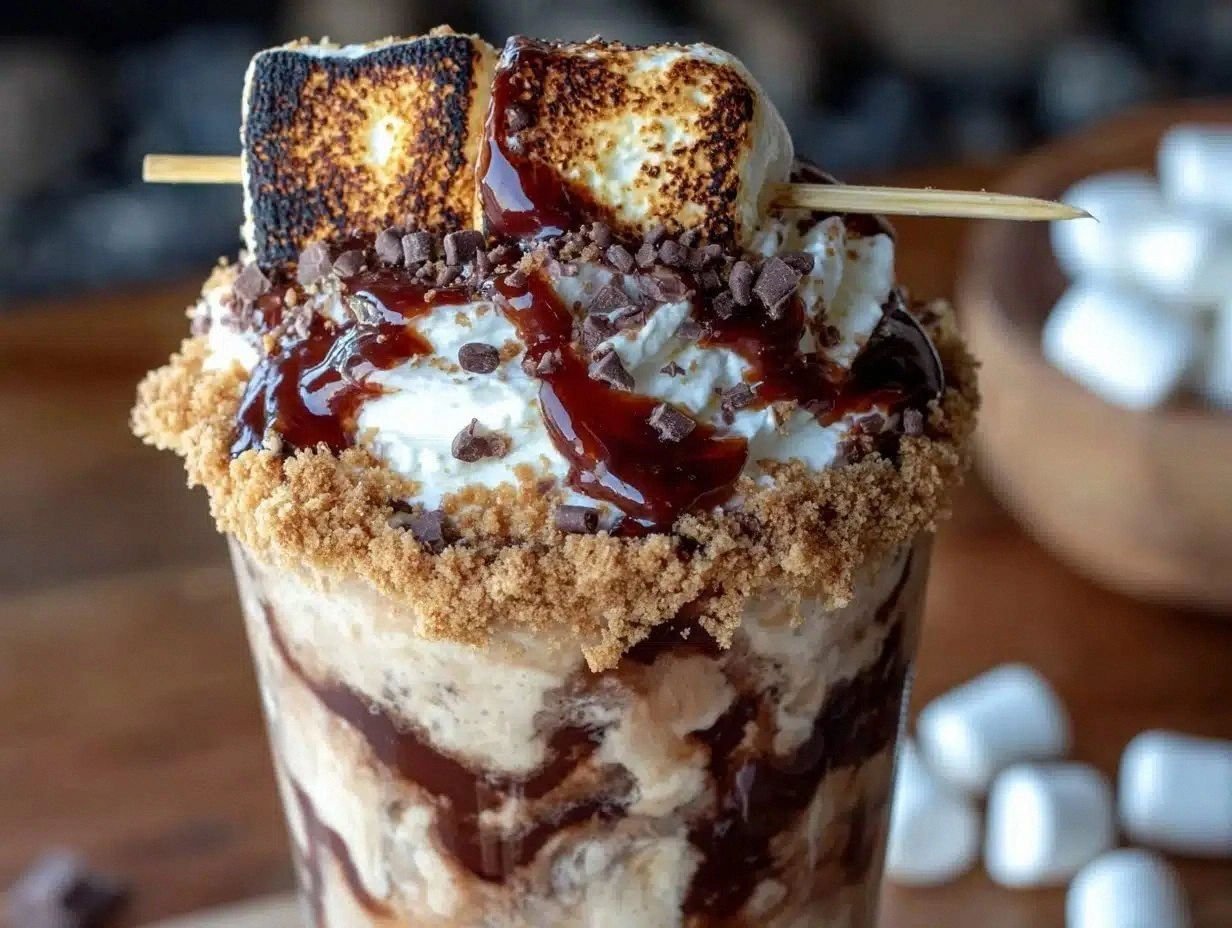
- Texture Trio: You get the icy chill of the blended base, the airy fluff of the whipped marshmallow topping, and the satisfying crunch of graham cracker crumbs—all in one glorious sip.
- Simplicity Meets Sophistication: Only seven core ingredients, yet each one is treated with a technique that elevates the whole drink, proving that you don’t need a pantry full of exotic items to impress.
- Unique Toasted Marshmallow Twist: Most recipes skip the toasting step, but we caramelize the marshmallows to add a smoky note that mimics a real campfire, turning the drink from ordinary to unforgettable.
- Crowd‑Pleaser Factor: Whether you’re serving kids, coffee snobs, or dessert lovers, the combination of coffee, chocolate, and marshmallow hits all the right notes, making it a universal favorite.
- Ingredient Quality: Using Ghirardelli cocoa and a dark roast ensures a rich, velvety base that cheap cocoa powders can’t match, while heavy cream gives the topping a luxurious mouthfeel.
- One‑Pan Efficiency: The entire recipe can be executed with just a blender, a saucepan, and a whisk, keeping cleanup minimal and the process streamlined.
- Make‑Ahead Potential: The base can be pre‑blended and stored, and the whipped topping holds its shape for hours, allowing you to prep in advance for parties.
Inside the Ingredient List
The Flavor Base
1 cup strong brewed coffee, cooled – I prefer a dark roast because its natural chocolatey undertones complement the cocoa without needing extra sugar. If you use a lighter roast, you’ll notice a brighter acidity that can clash with the marshmallow sweetness. Skipping this coffee would leave the drink tasting more like a chocolate milkshake, which defeats the purpose of a true frappuccino.
1 cup whole milk (or alternative) – Whole milk adds creaminess and body; almond or oat milk works well for dairy‑free versions but will slightly alter the mouthfeel. Choose a milk with low additives to keep the flavor pure. If you use a low‑fat milk, the drink may feel thinner and lose some of that luxurious silkiness.
2 tablespoons unsweetened cocoa powder – I reach for Ghirardelli because its deep, almost espresso‑like flavor layers perfectly with the coffee. A cheap cocoa can taste gritty and overly bitter, making the drink unbalanced. For a twist, try Dutch‑process cocoa for a smoother, richer texture.
2 tablespoons sugar – Adjust to taste; the marshmallow topping already adds sweetness, so you might want to start with 1½ tbsp and add more later if needed. Using raw or coconut sugar will give a subtle caramel note, but it may also introduce a grainy texture if not dissolved fully.
1 teaspoon pure vanilla extract – This tiny splash amplifies the aromatic profile, making the coffee and chocolate sing together. Avoid imitation vanilla; the synthetic flavor can taste flat and mask the nuanced notes of the brew.
The Creamy Cloud
½ cup heavy cream – The high fat content is essential for a stable, fluffy whipped topping that holds its shape in the glass. Substituting with half‑and‑half will result in a softer peak that collapses quickly.
1 tablespoon powdered sugar – It sweetens the whipped cream without adding grainy texture, blending seamlessly into the airy foam. If you prefer a less sweet topping, cut this in half.
½ cup mini marshmallows – Toasting these creates that signature caramelized exterior while keeping the interior soft. Skipping the toast will give you a bland, sugary topping that lacks the smoky depth.
Optional pinch of cinnamon or nutmeg – A dash of warm spice adds a subtle depth that echoes the campfire vibe. Too much, however, can overpower the delicate balance, so sprinkle sparingly.
The Final Flourish
Chocolate syrup – Drizzled inside the glass, it creates a visual swirl and adds an extra layer of chocolate richness that hits the palate just before the coffee does.
Graham cracker crumbs – Crushed lightly, they provide that iconic s’mores crunch and a subtle buttery note that ties the whole drink together. If you crush them too fine, they’ll turn soggy; aim for a coarse texture.
Everything's prepped? Good. Let's get into the real action…
The Method — Step by Step
First, brew a cup of strong dark roast coffee. I like to use a French press for maximum extraction; let it steep for four minutes, then pour it into a shallow dish to cool quickly. The coffee should be at room temperature, not hot, because hot liquid will melt the ice too fast and dilute the flavor. While the coffee cools, set a timer—this is your first micro‑challenge: can you keep the coffee perfectly cool without refrigeration?
While the coffee cools, toast the mini marshmallows. Spread them in a single layer on a dry skillet over medium heat. Constantly shake the pan; you’ll hear a soft sizzle as the sugars caramelize. When the marshmallows turn a deep golden‑brown with a faint smoky aroma, remove them immediately to prevent burning. Watch Out: Over‑toasting turns them black and bitter, ruining the sweet‑smoky balance.
Watch Out: If you let the marshmallows sit too long after toasting, they’ll harden and lose their fluffy interior. Use them within two minutes.Now, whip the heavy cream. In a chilled bowl, combine the ½ cup heavy cream, 1 tablespoon powdered sugar, and the optional pinch of cinnamon. Using a handheld whisk, beat on medium‑high speed until soft peaks form—this should take about 2‑3 minutes. The cream should hold its shape but still be slightly glossy; over‑whipping will turn it buttery and separate.
Kitchen Hack: Chill your mixing bowl and whisk for 10 minutes before whipping; this speeds up the process and yields fluffier peaks.Blend the base. In a high‑speed blender, combine the cooled coffee, whole milk, cocoa powder, sugar, vanilla extract, and a full cup of ice cubes. Blend on high for 30‑45 seconds, until the mixture is silky smooth and the ice is fully pulverized. The texture should be thick enough to coat the back of a spoon but still pourable. If it’s too thick, add a splash of extra milk; if too thin, toss in a few more ice cubes.
Prepare the glass. Drizzle chocolate syrup along the inside walls of each serving glass, creating a swirling pattern. Then, sprinkle a generous pinch of graham cracker crumbs at the bottom. This layer will melt slightly when the cold drink hits it, releasing a buttery crunch that’s pure nostalgia.
Assemble the drink. Pour the blended coffee‑cocoa mixture into the prepared glass, leaving about an inch of space at the top for the whipped topping. The drink should sit like a dark velvet curtain, ready for its crowning glory.
Top with toasted marshmallow foam. Gently spoon the whipped cream over the surface, then sprinkle the freshly toasted mini marshmallows on top. The marshmallows should sit like tiny snowcaps, their caramelized edges catching the light. For extra drama, you can torch the marshmallows for a few seconds to deepen the color—just be careful not to burn them.
Kitchen Hack: If you don’t have a torch, place the topped glass under a broiler for 15 seconds; watch closely!Final flourish. Give the glass a gentle tap to settle the foam, then finish with a final drizzle of chocolate syrup over the marshmallows. The contrast of glossy chocolate against the fluffy, toasted marshmallow is the visual climax of this drink. Serve immediately, and watch as your guests’ eyes widen with anticipation.
That's it — you did it. But hold on, I've got a few more tricks that'll take this to another level. Stick around, because the next section will turn your good drink into a legendary one.
Insider Tricks for Flawless Results
The Temperature Rule Nobody Follows
Never blend a hot coffee with ice; the sudden temperature shock creates a watery mess and prevents the ice from fully pulverizing. Cool the coffee to room temperature, or even chill it in the fridge for 10 minutes, before blending. This ensures the ice stays solid long enough to create that thick, slushy texture we crave. I once tried blending hot coffee straight from the pot and ended up with a soupy mess that tasted like watered‑down espresso. Trust me, the extra cooling step is worth the few minutes of patience.
Why Your Nose Knows Best
Your sense of smell is the secret weapon for perfect balance. When you blend the base, pause and inhale the aroma; you should detect coffee, chocolate, and a faint vanilla undertone. If the scent leans too bitter, add a pinch more sugar; if it’s overly sweet, a dash more coffee will bring it back. This nose‑test is a quick, reliable way to avoid over‑ or under‑seasoning, and it’s a trick I learned after a disastrous batch that was too sweet for my own palate.
The 5‑Minute Rest That Changes Everything
After whipping the cream, let it sit for exactly five minutes before using it as a topping. This short rest allows the air bubbles to stabilize, giving the foam a silkier texture that doesn’t collapse when it meets the cold drink. Skipping this rest will result in a topping that deflates quickly, turning your drink into a soggy mess. I’ve seen novices pour the whipped cream immediately and lose that airy lift—don’t be that person.
Graham Cracker Crumble Timing
Add the graham cracker crumbs just before serving, not earlier. If they sit too long, they absorb moisture from the drink and become soggy, losing that satisfying crunch. A quick sprinkle right before the final drizzle keeps them crisp and adds that authentic s’mores texture. I once pre‑mixed the crumbs into the base and ended up with a mushy bottom—lesson learned.
The Double‑Layered Chocolate Swirl
For a richer visual impact, use two types of chocolate syrup: a dark, bitter one for the inner swirl and a milk chocolate for the outer drizzle. The contrast not only looks impressive but also adds a subtle flavor complexity that makes each sip feel new. This technique is a crowd‑pleaser at brunches where people love to Instagram their drinks.
Micro‑Challenge: The Marshmallow Flip
If you really want to impress, try flipping the toasted marshmallows onto the whipped cream using a spatula, creating a “marshmallow cascade.” It’s a tiny performance that adds drama without extra effort. I’ve watched guests gasp when the marshmallows tumble like snowflakes—trust me, it’s worth the extra second of finesse.
Creative Twists and Variations
This recipe is a playground. Here are some of my favorite ways to switch things up:
Peppermint Mocha S’mores
Add a teaspoon of peppermint extract to the base and garnish with crushed candy canes instead of graham crackers. The cooling mint balances the rich chocolate, creating a festive holiday vibe that’s perfect for December gatherings.
Nutty Caramel Delight
Stir in a tablespoon of caramel sauce into the blended base and sprinkle toasted pecans on top of the whipped cream. The caramel adds a buttery sweetness, while the nuts contribute a crunchy contrast that elevates the texture profile.
Vegan Dream
Swap whole milk for oat milk, heavy cream for coconut cream, and use vegan marshmallows. The result is a dairy‑free version that still delivers that fluffy, toasted topping, though the coconut flavor adds an exotic twist.
Spiced Autumn S’mores
Replace the pinch of cinnamon with a blend of pumpkin spice and add a drizzle of pumpkin puree into the base. This version is perfect for crisp October evenings, delivering a warm, earthy undertone that pairs beautifully with the coffee.
White Chocolate Raspberry
Swap the dark chocolate syrup for white chocolate, and fold a tablespoon of raspberry puree into the base. The fruity acidity cuts through the richness, offering a bright, spring‑time twist that’s both elegant and playful.
Storing and Bringing It Back to Life
Fridge Storage
Transfer any leftover base to an airtight container and store in the refrigerator for up to 48 hours. Give it a quick shake before using to recombine any settled ingredients. The whipped topping can be kept in a separate bowl, covered with plastic wrap, and will hold its shape for about 24 hours.
Freezer Friendly
If you anticipate a large batch, pour the blended base into a freezer‑safe zip‑lock bag, flatten it, and freeze for up to one month. When ready, thaw in the fridge overnight and give it a brief blend to restore texture. The toasted marshmallows should be stored in a sealed container at room temperature to maintain their crunch.
Best Reheating Method
To revive a chilled base, add a splash of water (about 2‑3 tablespoons per cup) and blend on low speed for 10 seconds. The water creates steam that re‑hydrates the mixture, bringing back its original silky mouthfeel without diluting the flavor. Avoid microwaving, as it can cause the coffee to become bitter and the ice to melt unevenly.