Picture this: It's 11:47 p.m. on a Tuesday, and I'm standing in my kitchen wearing mismatched socks, staring longingly at the last slice of leftover pizza that definitely isn't keto-friendly. The craving hits like a freight train—those familiar Philly cheesesteak flavors, that melty cheese, those tender onions and peppers, all wrapped up in something that won't kick me out of ketosis faster than you can say "bread roll." Most people would grab a lettuce wrap and call it a night, but not me. Not when I know there's a better way hiding in plain sight. That's how these Keto Philly Cheesesteak Roll Ups were born, and let me tell you, they changed everything.
The first time I made these, my neighbor knocked on my door at midnight because she could smell them through the wall. True story. The aroma of sizzling onions, peppers, and roast beef wrapped in crispy cheese filled my entire apartment building like some kind of delicious smoke bomb. I had to make a second batch just to get her to leave (and to have leftovers for my lunch, obviously). These roll ups deliver everything you love about the classic sandwich—the savory beef, the sweet caramelized vegetables, that gooey cheese pull—without any of the carb-heavy bread that makes traditional Philly cheesesteaks a keto nightmare.
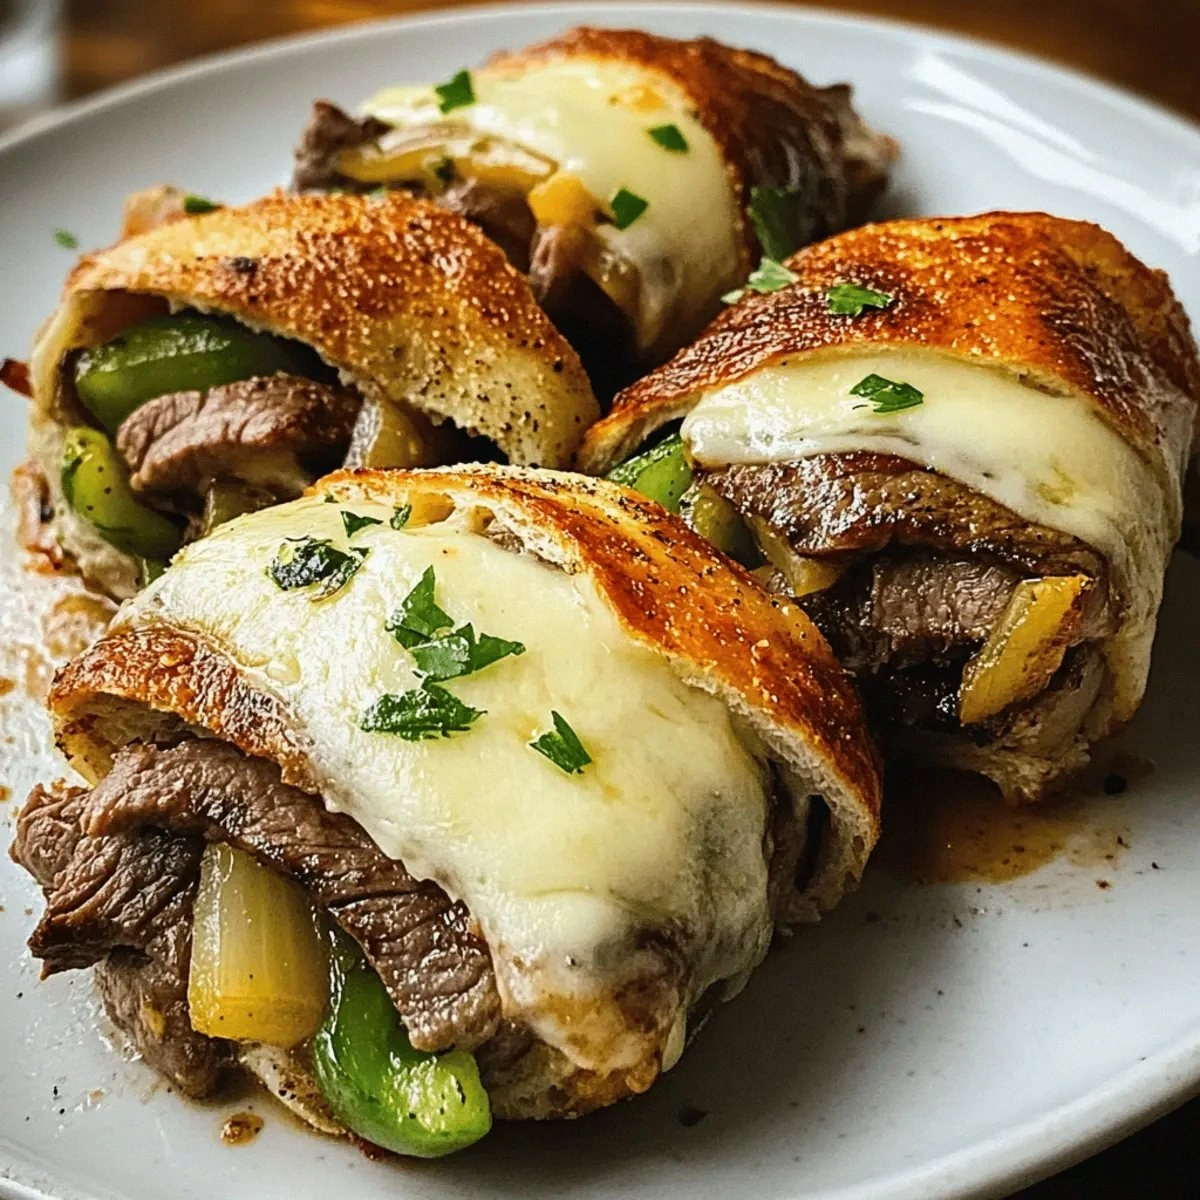
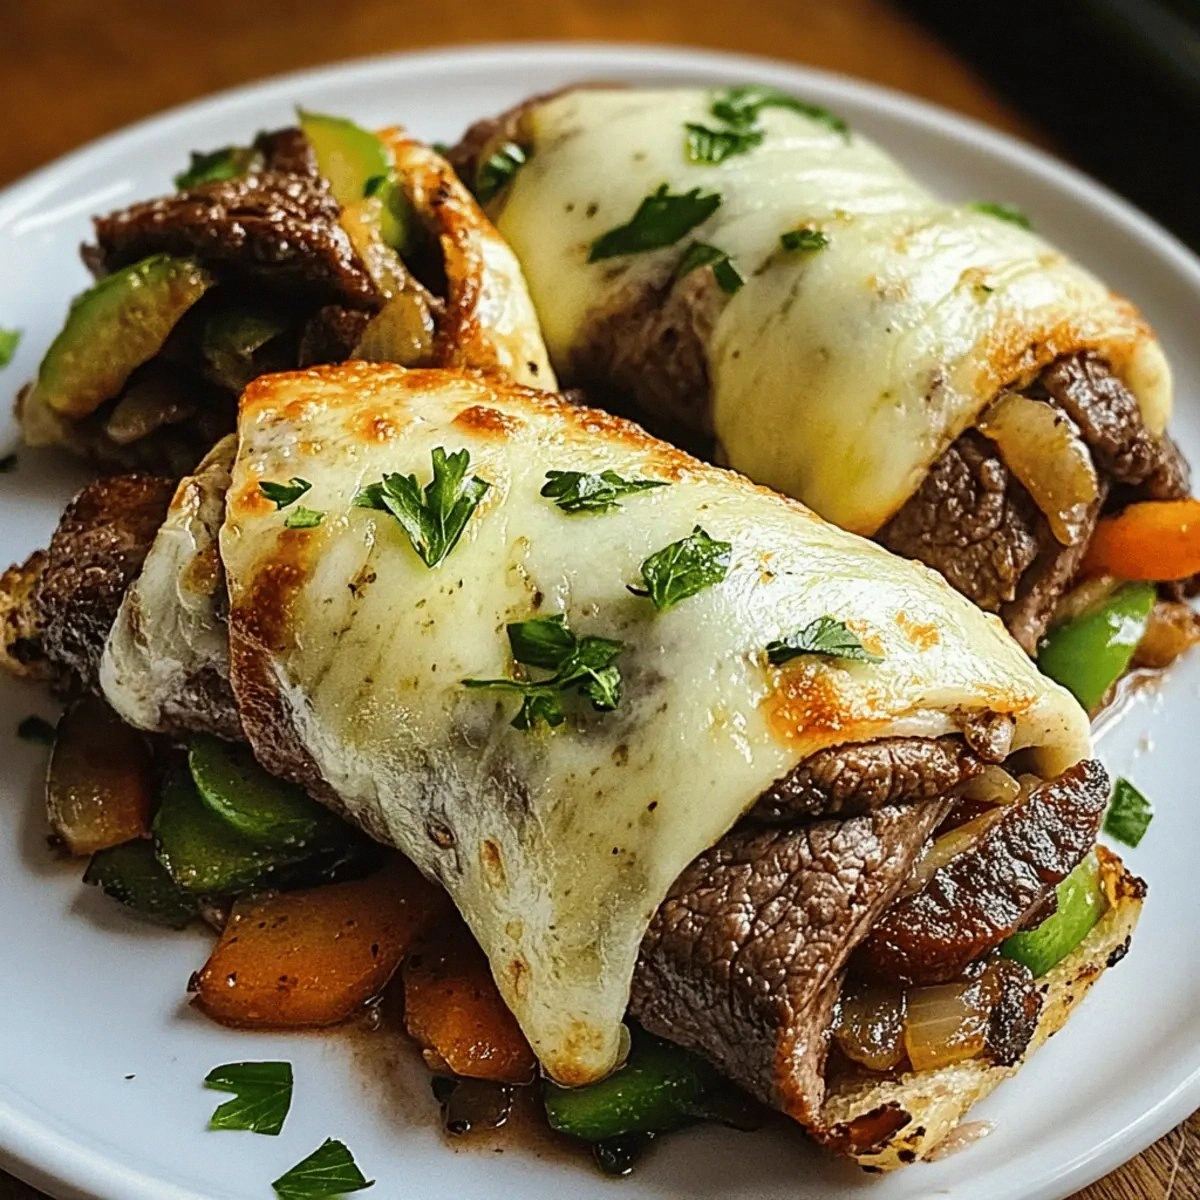
What makes this version special isn't just that it's low-carb (though at just 3 net carbs per roll up, that's pretty spectacular). It's the technique that transforms ordinary provolone cheese into a crispy, pliable wrapper that holds everything together while adding another layer of rich, nutty flavor. We're talking about edges that shatter like thin ice when you bite into them, revealing a molten center of perfectly seasoned beef and vegetables that taste like they spent hours in the kitchen. The secret lies in the cheese-weaving method I discovered after ruining at least seventeen attempts that ended up as cheese puddles on my baking sheet.
If you've ever struggled with soggy cheese wraps that fall apart faster than your New Year's resolutions, or if you've tried those sad lettuce wraps that taste like diet food and disappointment, this recipe is about to become your new best friend. I'm about to show you exactly how to achieve that perfect balance of crispy and tender, how to get your vegetables perfectly caramelized without overcooking your beef, and how to roll these beauties so they look like they came from a fancy restaurant. Stay with me here—this is worth it.
What Makes This Version Stand Out
Cheese Transformation: The provolone doesn't just melt—it undergoes a magical metamorphosis into a crispy, flexible wrapper that holds everything together while adding a deep, nutty flavor that regular bread could never provide. Most recipes get this wrong by using the wrong temperature or timing, resulting in either rubbery cheese that stretches into an unappetizing mess or burnt cheese that tastes like regret.
Flavor Concentration: Because we're not hiding the ingredients behind a mountain of bread, every single component gets its moment to shine. The vegetables caramelize to sweet perfection, the roast beef develops those gorgeous browned edges, and the garlic powder blooms into aromatic heaven. Each bite delivers a concentrated burst of Philly cheesesteak flavor that makes the original sandwich taste bland by comparison.
Texture Symphony: We're creating a textural experience that rivals any high-end restaurant dish. The crispy cheese edges give way to tender beef, followed by the slight crunch of perfectly cooked vegetables, all held together by that melty cheese center. It's like eating a Philly cheesesteak through a funhouse mirror—familiar, but somehow better than the original.
Zero Carb Guilt: Traditional Philly cheesesteaks pack a whopping 45-50 grams of carbs per sandwich, but these roll ups keep it under 3 net carbs while delivering all the satisfaction. You could eat the entire batch and still stay in ketosis, though I don't recommend explaining that to your family when they ask why you didn't make enough to share.
Make-Ahead Magic: These roll ups reheat beautifully, making them perfect for meal prep Sunday or those nights when you need dinner on the table in under five minutes. The flavors actually improve overnight as the seasonings meld together, creating something even more delicious than the day you made them.
Crowd-Pleasing Power: I've served these to carb-loving friends who had no idea they were keto, and watched them devour four or five without coming up for air. Kids love them because they're fun finger food, adults love them because they taste indulgent, and you'll love them because they make you look like a kitchen wizard without any actual wizardry required.
Ingredient Quality Matters: Using thinly sliced roast beef from the deli counter instead of pre-packaged lunch meat makes a world of difference in both flavor and texture. The same goes for fresh vegetables versus frozen—the extra few minutes of prep work pays off in a big way when you're biting into that first perfect roll up.
Inside the Ingredient List
The Flavor Foundation
Olive oil isn't just a cooking fat here—it's the canvas that carries all the other flavors and prevents everything from sticking to your pan like culinary superglue. I use a tablespoon of good quality extra virgin olive oil because it adds a subtle fruitiness that complements the beef beautifully, but any neutral oil will work if you're in a pinch. The key is heating it until it shimmers like liquid gold but before it starts smoking, which means your pan is at the perfect temperature for caramelizing vegetables without burning them.
The thinly sliced roast beef is the star of this show, and skimping here is like casting a community theater actor in a Broadway role—it just won't deliver the performance you need. Look for roast beef that's sliced so thin you can practically read through it, but still has visible marbling that will render down and keep everything moist. If your deli counter looks at you funny when you ask for it "shaved," tell them you want it sliced on the thinnest setting they've got. Trust me, they secretly love the challenge.
The Texture Crew
Green bell peppers bring that unmistakable Philly flavor, but they also add a crucial textural element that prevents these roll ups from becoming a one-note mush fest. I dice them small enough to cook quickly but large enough to maintain some bite—about 1/4-inch pieces that caramelize on the edges while staying slightly crisp in the center. If you're one of those people who thinks green peppers are too bitter, you can use half green and half red for a sweeter profile, but going full red pepper makes these taste more like fajitas than cheesesteaks.
The onion is your secret weapon for adding natural sweetness without any added sugar, and cooking it slowly brings out those gorgeous golden edges that taste like concentrated umami bombs. I use a medium onion because it cooks down more than you'd expect, and slicing it thin ensures it integrates perfectly with the other fillings without creating giant onion pulls that tear through your cheese wrapper. Yellow onions work best here because they strike the perfect balance between sweet and savory, but white onions will do if that's what you've got.
Mushrooms are the unexpected hero that adds meaty texture and earthy depth without competing with the beef for attention. They're like the bass player in a rock band—essential for rounding out the flavor, but happy to let others take the spotlight. Slice them about 1/8-inch thick so they cook quickly but don't disappear entirely into the mix. If you're not a mushroom person, you can leave them out, but you'll be missing out on that restaurant-quality depth that makes people ask "what's your secret?"
The Unexpected Star
Garlic powder might seem basic, but it's the difference between flat and fantastic in this recipe. Fresh garlic would burn and turn bitter during the cooking process, but garlic powder blooms and mellows, creating a subtle background note that ties everything together. I use a full teaspoon because we're dealing with bold flavors here, but if you're sensitive to garlic, you can dial it back to 3/4 teaspoon. Just don't skip it entirely unless you want your roll ups to taste like something's missing.
Salt and pepper are the dynamic duo that amplify all the other flavors, but timing is everything. I season each component as it cooks—the vegetables get seasoned when they go in the pan, the beef gets seasoned when it joins the party, and everything gets a final adjustment before assembly. This layer-by-layer approach builds complexity instead of just making everything taste salty. Use kosher salt if you've got it; the larger crystals make it easier to control the seasoning.
The Final Flourish
Provolone cheese is where the magic happens, and using the cheap stuff is like trying to make a Ferrari out of cardboard—it might look similar from a distance, but it won't perform when you need it to. Look for provolone that's aged at least 6 months for the best flavor and melting properties. The slices should be thin enough to roll but not so thin they tear when you handle them. If you can only find thick slices, you can gently pound them thinner with a rolling pin between two pieces of parchment paper.
The Method — Step by Step
- Start by heating your olive oil in a large skillet over medium heat until it shimmers and moves like water when you tilt the pan. You're looking for the perfect temperature where vegetables will sizzle when they hit the oil but won't immediately brown—about 2-3 minutes of heating should do it. While you're waiting, prep all your vegetables because once things start cooking, you'll need to move fast. This is where mise en place becomes your best friend, not just a fancy French term that makes you sound like you know what you're doing.
- Add your diced onions first, spreading them in an even layer across the pan like you're creating a tiny onion carpet. Let them cook undisturbed for about 2 minutes to develop those gorgeous golden edges that add depth to the final dish. Then stir occasionally for another 3-4 minutes until they start to turn translucent and smell sweet. The sizzle should sound like applause at a small concert—not overwhelming, but definitely audible.
- Throw in your bell peppers and mushrooms, and here's where the magic starts happening. The vegetables will release their moisture, creating a symphony of sizzling sounds that tells you everything is working perfectly. Cook for 5-6 minutes, stirring occasionally, until the mushrooms have given up their liquid and it's starting to evaporate. You'll know you're there when the vegetables look glossy and the pan sounds less like a rainforest and more like a gentle summer rain.
- Season with half your garlic powder, salt, and pepper, stirring to distribute everything evenly. The garlic powder will bloom in the oil, creating an aroma that makes your neighbors jealous and your stomach growl louder than your morning alarm. Cook for another minute to let the spices toast slightly, but don't let them burn—burnt garlic powder tastes like disappointment and bad decisions.
- Push all the vegetables to one side of the pan and add your roast beef to the empty space, letting it sear for about 30 seconds before stirring everything together. This technique gives the beef those beautiful caramelized edges that add texture and flavor. Season with the remaining garlic powder, salt, and pepper, then cook for 2-3 minutes until the beef is heated through and starting to crisp at the edges.
- Transfer the entire mixture to a bowl and let it cool for about 5 minutes. This cooling step is crucial—if the filling is too hot when you add it to the cheese, it'll make the cheese melt prematurely and create a mess that looks like modern art but tastes like failure. While it's cooling, preheat your oven to 375°F and line a baking sheet with parchment paper or a silicone mat.
- Lay out your provolone slices on the prepared baking sheet, making sure they don't overlap but are close enough that you can work quickly. You're creating little cheese foundations that will become your roll up wrappers, so space them like you're arranging cookies on a sheet—not touching, but not lonely either. Each slice should look like a tiny cheese moon waiting for its filling spaceship.
- Bake the provolone for 8-10 minutes, watching carefully for the edges to turn golden brown while the center looks set but not crispy. This is the moment of truth—pull them out too early and they'll be rubbery, leave them too long and they'll shatter like your dreams of winning the lottery. The cheese should look like it's thinking about becoming crispy but hasn't quite committed yet.
- Remove the baking sheet from the oven and let the cheese cool for about 30 seconds—it should still be pliable but not so hot that it burns your fingers. Working quickly (but carefully), divide the filling among the cheese slices, placing it in a line across the center of each one. Don't overfill them—about 2 tablespoons per slice is perfect. Any more and they'll explode like little meat grenades when you try to roll them.
- Roll each cheese slice around the filling, starting from one edge and rolling tightly but gently. The cheese should be flexible enough to roll without cracking but firm enough to hold its shape. Place them seam-side down on the baking sheet and let them set for 2-3 minutes. This resting period lets the cheese firm up so your roll ups hold together when you pick them up, creating the perfect handheld keto snack.
Insider Tricks for Flawless Results
The Temperature Rule Nobody Follows
Here's the thing that separates mediocre roll ups from the kind that make people write poetry about your cooking: temperature control. If your filling is even slightly warm when you add it to the cheese, you'll get a melty disaster that looks like abstract art. I learned this the hard way after serving what looked like cheese roadkill to my in-laws. Let that filling cool completely—stick it in the fridge for 10 minutes if you're impatient. The cheese needs to set just enough to hold its shape but stay pliable for rolling. It's like the difference between yoga and rigor mortis.
Your oven temperature matters more than you think. Every oven is a unique snowflake with hot spots and mood swings, so get to know yours like it's a temperamental cat. If your cheese isn't browning after 8 minutes, bump up the temperature by 25 degrees. If it's browning too fast, lower it by 25 degrees. This isn't baking—it's more like negotiating with a toddler. Sometimes you need to adjust your approach mid-process.
Why Your Nose Knows Best
Forget timers—your nose is the most sophisticated kitchen tool you own. When those onions start smelling like caramel and the garlic powder blooms into aromatic heaven, you're on the right track. The mushrooms will give off an earthy scent when they're perfectly cooked, and the roast beef develops a rich, meaty aroma when it's ready. Train yourself to cook with your senses, not just your eyes and a recipe card. That smell when the provolone hits the oven—nutty, slightly sweet, with hints of butterscotch—that's when you know you've achieved cheese nirvana.
A friend tried making these while texting her boyfriend and burned the cheese so badly it set off every smoke detector in her apartment building. Don't be that friend. Stay present, stay focused, and let your senses guide you. The difference between good and great cooking often comes down to paying attention instead of multitasking your way to mediocrity.
The 5-Minute Rest That Changes Everything
After you roll these beauties up, resist the urge to immediately shove one in your mouth. I know, I know—fresh from the oven, they smell like everything good about the universe concentrated into one perfect bite. But give them 5 minutes to set properly. During this time, the cheese firms up slightly, the flavors meld together, and the whole thing transforms from a potentially messy snack into a sophisticated appetizer that you could serve at a dinner party without embarrassing yourself.
This rest period also lets the filling cool slightly, preventing that dreaded tongue-burn that ruins the eating experience. You know the one—where you get so excited about how good something smells that you burn your mouth and can't taste anything for three days. Patience is a virtue, especially when it comes to molten cheese and hot beef. Your future self (and your taste buds) will thank you for waiting.
Creative Twists and Variations
This recipe is a playground. Here are some of my favorite ways to switch things up:
The Pizza Lover's Dream
Swap out the roast beef for thinly sliced pepperoni and add a teaspoon of Italian seasoning to the vegetables. Use mozzarella instead of provolone for that authentic pizza flavor, and serve with a side of low-carb marinara for dipping. It's like eating a pizza roll but without the carb coma that usually follows. My nephew calls these "pizza cigars" and requests them every time he visits, which is saying something since he normally won't touch anything that doesn't come from a drive-through window.
The Spicy Southwest Version
Add a diced jalapeño to the vegetable mix and swap the garlic powder for cumin and chili powder. Use pepper jack cheese instead of provolone for an extra kick, and serve with a dollop of sour cream mixed with lime juice and cilantro. These disappear faster than free samples at Costco whenever I bring them to parties. The spice level is perfect—noticeable but not so hot that you need a fire extinguisher nearby.
The Breakfast Champion
Replace the roast beef with cooked breakfast sausage, add some scrambled eggs to the filling, and use cheddar cheese for the wrapper. These make incredible grab-and-go breakfast options that keep you full until lunch without the mid-morning carb crash. I make a batch of these every Sunday and they get me through the week without resorting to questionable vending machine choices at work.
The Mediterranean Makeover
Use thinly sliced chicken breast seasoned with oregano and lemon, add some chopped olives and sun-dried tomatoes to the vegetable mix, and use feta cheese for the wrapper. These taste like you're sitting at a seaside taverna instead of standing in your kitchen in your pajamas. The briny olives and tangy feta create a flavor profile that makes you forget you're eating something healthy.
The Surf and Turf Special
Add some cooked shrimp to the roast beef mixture and use a blend of provolone and mozzarella for the cheese wrapper. Add a squeeze of lemon juice to the filling for brightness. This variation sounds fancy but takes no extra time, and it elevates the dish from casual snack to impressive appetizer. Serve these at your next dinner party and watch your guests try to figure out how you made something so sophisticated in under 30 minutes.
The Kid-Friendly Classic
Make a milder version by using only onions and no peppers, season with just salt and pepper, and use mild cheddar cheese. Cut them into smaller pieces and serve with sugar-free ketchup for dipping. Even picky eaters love these because they taste like cheeseburgers without the bun. My friend's five-year-old who refuses to eat anything green devours these and asks for them by name.
Storing and Bringing It Back to Life
Fridge Storage
Store cooled roll ups in an airtight container with parchment paper between layers to prevent sticking. They'll keep for up to 5 days in the refrigerator, though they're best within the first 3 days when the cheese is at its crispiest. Don't stack them more than two layers deep or the weight will compress the bottom ones into sad, flat versions of their former glory. I've successfully kept these in glass containers with tight-fitting lids, but if you're using plastic wrap, make sure it's not touching the cheese or it'll stick and tear when you unpeel it.
Freezer Friendly
These freeze beautifully for up to 2 months, making them perfect for meal prep emergencies. Flash freeze them on a baking sheet for 2 hours first, then transfer to a freezer bag with parchment paper between layers. This prevents them from freezing into one solid block that requires a chisel to separate. When you're ready to eat, thaw overnight in the refrigerator rather than at room temperature, which can make the cheese weep and create a soggy mess. They won't be quite as crispy as fresh, but they're still miles better than most frozen appetizers.
Best Reheating Method
Skip the microwave unless you enjoy rubbery cheese and sad vegetables. Instead, reheat in a 350°F oven for 8-10 minutes or in an air fryer at 350°F for 4-5 minutes. The air fryer method is magical—it brings back that original crispiness like you've just made them fresh. If you're in a hurry, you can reheat them in a dry skillet over medium heat for 2-3 minutes per side, which actually works better than you'd expect. Add a tiny splash of water to the pan before covering with a lid—it creates steam that warms everything through without drying out the cheese.