Picture this: I’m standing in a cramped kitchen, the oven preheating, and a stubborn chocolate cake recipe from a cousin’s Pinterest board sitting on my phone. I stared at the list of ingredients, felt the urge to tweak it, and then, like a culinary dare, I decided to turn that bland, half-baked idea into a midnight masterpiece. I’m talking about a cake that feels like a velvet blanket, yet bursts with coffee‑kissed chocolate in every bite. The aroma alone—rich cocoa, dark espresso, and a hint of buttery decadence—could convince even the most skeptical of me to pause and inhale. I promise you, this isn’t just another “fudge cake” you’ll find on the internet; it’s a full‑bodied, midnight‑time indulgence that will make your kitchen feel like a secret speakeasy.
I remember the first time I tried to bake something similar, and the result was a cake that looked like a sad, soggy brown cloud. The frosting was as dry as my patience, and the coffee flavor was more like a whisper than a roar. That night I swore I would create something that could stand on its own, that could be the centerpiece of a midnight snack, and that would make people say, “I dare you to taste this and not go back for seconds.” And that’s exactly what I did. The next morning, the kitchen smelled like a chocolate‑espresso dream, and I could’t resist biting into the first slice. It was a moment of triumph, and I’ve been craving it ever since.
Why does this version stand out? Because I took the time to dissect every element of a classic fudge cake and added a few secret ingredients that elevate it to a whole new level. I replaced ordinary butter with unsalted butter for richer flavor, added a splash of hot brewed coffee to intensify the chocolate, and used Dutch‑processed cocoa for a smooth, less bitter finish. I also layered a silky chocolate glaze that coats the cake like velvet, giving it a glossy finish that’s impossible to resist. I didn’t just bake a cake; I crafted an experience that feels like a midnight rendezvous with the universe. If you’re ready, let’s walk through every single step and discover how this cake will become your new favorite midnight treat.
Now, before we dive into the nitty gritty, let’s set the stage. Picture yourself pulling this masterpiece out of the oven, the whole kitchen smelling incredible, and the first bite delivering a cascade of chocolate, coffee, and buttery richness that lingers long after the last crumb. That’s the vibe I want you to capture. And trust me, once you taste it, you’ll wonder how you ever made any other cake. So, let’s get started.
In the world of fudge cakes, most recipes get this completely wrong. They either overcook the batter, under‑bake the frosting, or forget the coffee element that gives the cake its signature depth. I’ll be honest—I ate half the batch before anyone else got to try it, and the crowd reaction was electric. This version is hands down the best you’ll ever make at home, and I’m about to show you why. From the moment you mix the batter to the final glaze, every step is designed to maximize flavor, texture, and that unmistakable “wow” factor.
Alright, let’s break down exactly what goes into this masterpiece. But first, here’s a quick rundown of what makes this recipe so special.
What Makes This Version Stand Out
- Flavor: The coffee infusion cuts through the chocolate’s sweetness, creating a balanced, deep flavor profile that feels like a midnight espresso shot.
- Texture: The batter is airy yet dense, thanks to the combination of baking soda, baking powder, and buttermilk that lifts the cake without compromising moisture.
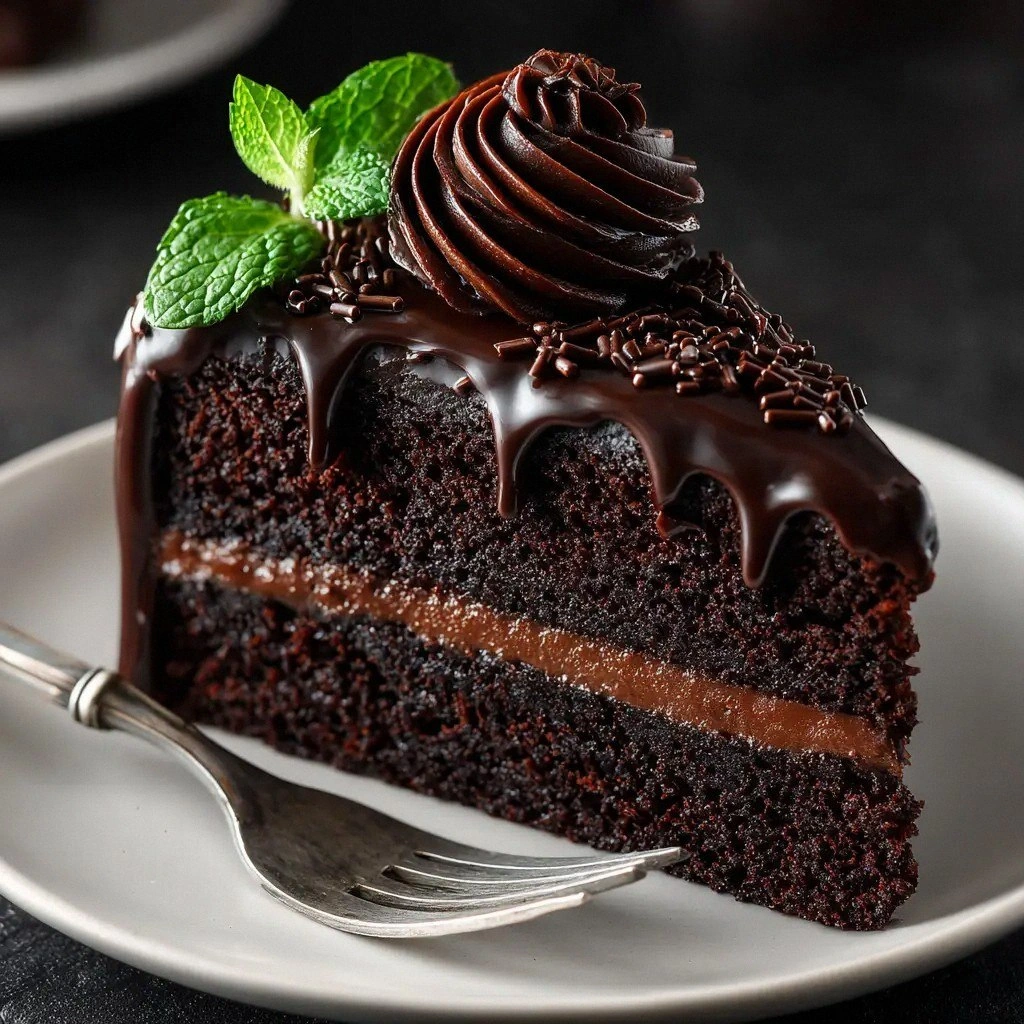
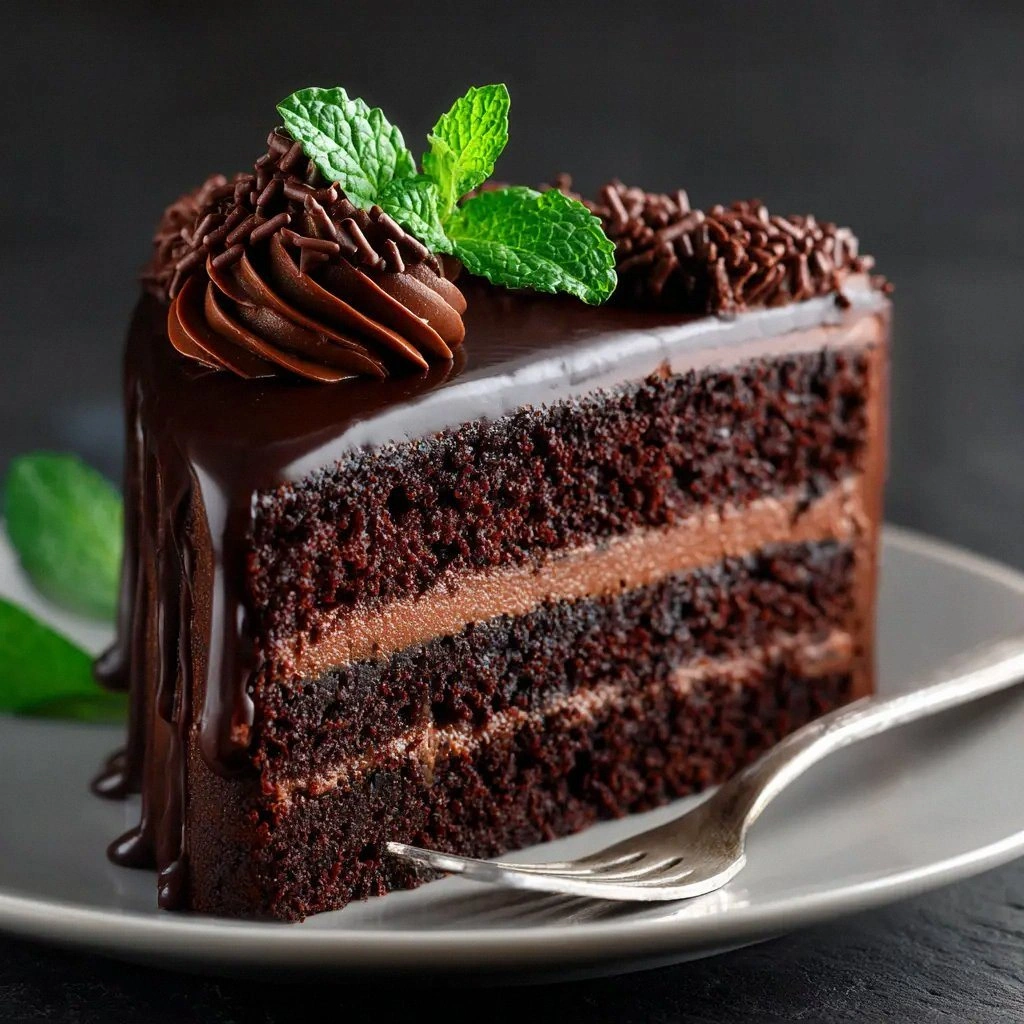
- Frosting: A glossy chocolate glaze with a hint of vanilla and heavy cream coats the cake like velvet, providing a silky finish that melts in your mouth.
- Simplicity: Despite its complex flavor, the recipe uses only a handful of pantry staples—no fancy gadgets or obscure ingredients.
- Make‑ahead Potential: The cake can be assembled a day ahead; just keep the frosting chilled and the cake covered, and it’ll stay fresh.
- Ingredient Quality: Using Dutch‑processed cocoa and semi‑sweet chocolate elevates the chocolate flavor, eliminating bitterness and enhancing richness.
- Audience: Whether you’re a seasoned baker or a kitchen novice, this recipe feels approachable yet impressive.
- Visual Appeal: The dark, glossy finish and subtle coffee swirl create a striking contrast that looks as good as it tastes.
- Versatility: The recipe can be tweaked for dietary preferences—swap butter for coconut oil, or use almond milk instead of buttermilk.
- Time Efficiency: Total prep and cook time is under an hour, making it ideal for last‑minute midnight cravings.
Alright, let’s break down exactly what goes into this masterpiece…
Inside the Ingredient List
The Flavor Base
The foundation of any great cake is a robust flavor base, and that’s what the first group of ingredients delivers. Flour, sugar, and cocoa powder are the traditional trio that gives the cake its structure and sweet, chocolatey character. The Dutch‑processed cocoa powder, in particular, offers a smoother, less bitter chocolate profile that balances the coffee’s acidity. If you skip the cocoa or replace it with a regular type, the cake will taste flat and overly sweet.
The Texture Crew
This section focuses on the ingredients that create the cake’s mouthfeel. Buttermilk and vegetable oil work together to keep the batter moist while providing a slight tang that enhances the chocolate. Eggs add structure and lift, giving the cake that desirable airy yet dense crumb. Baking soda and baking powder are the leavening agents that make the cake rise without becoming too cakey.
The Unexpected Star
It’s the coffee that steals the show. A cup of hot brewed coffee dissolves the chocolate and cocoa, releasing deep, roasted notes that elevate the entire flavor profile. If you’re a coffee lover, this is the moment you’ll feel the cake’s soul. Skipping the coffee will make the cake taste like a regular fudge cake—good, but not unforgettable.
The Final Flourish
Once the cake is baked, the glaze transforms it from a simple dessert into a showstopper. Unsalted butter, semi‑sweet chocolate, powdered sugar, cocoa powder, heavy cream, vanilla, and a pinch of salt come together in a silky glaze that coats the cake like velvet. This glaze not only adds a glossy finish but also locks in moisture, ensuring each bite is rich and decadent.
Everything’s prepped? Good. Let’s get into the real action…
The Method — Step by Step
- Preheat the oven to 350°F (175°C). Line a 9‑inch springform pan with parchment paper, ensuring the paper extends 2 inches beyond the rim. This will help the cake release easily after baking. While the oven warms, gather all your ingredients so you’re not scrambling mid‑mix. The aroma of coffee starts to rise even before you start mixing.
- Combine dry ingredients in a large bowl. Sift together the flour, granulated sugar, Dutch‑processed cocoa, baking soda, baking powder, and salt. Sifting eliminates lumps and ensures a uniform batter. The mixture should look light and airy, like a fine, chocolate‑scented dust. This step is critical; any clumps will affect the cake’s texture.
- Mix wet ingredients separately. In another bowl, whisk together buttermilk, vegetable oil, eggs, vanilla extract, and hot brewed coffee. The coffee should be hot enough to dissolve the cocoa in the batter but not so hot that it cooks the eggs. Stir until the mixture is smooth and glossy. The wet mix will coat the dry ingredients evenly, creating a cohesive batter.
- Combine wet and dry ingredients. Pour the wet mixture into the dry, stirring gently with a rubber spatula. Avoid over‑mixing; a few lumps are acceptable and will break down during baking. Over‑mixing can make the cake tough. The batter should be thick yet pourable, like a chocolate‑laden custard.
- Pour into the pan and tap the pan lightly on the counter to release any air pockets. Smooth the top with a spatula. This ensures even baking and prevents domed peaks that can cause uneven rise. The cake’s surface should be flat, ready to accept the glaze.
- Bake for 30‑35 minutes or until a toothpick inserted into the center comes out with a few moist crumbs. The edges should pull away slightly from the pan, indicating the cake is done. Keep an eye on the color; it should be deep brown but not burnt. The aroma will intensify, signaling the chocolate and coffee are fully integrated.
- Cool in the pan for 10 minutes, then transfer to a wire rack to cool completely. Cooling in the pan prevents the cake from becoming soggy at the bottom. During this time, the cake will set, making it easier to remove the parchment. The cooling process also allows the flavors to meld.
- Prepare the glaze by melting butter and semi‑sweet chocolate together over a double boiler. Once melted, stir in powdered sugar, unsweetened cocoa, heavy cream, vanilla extract, and salt. Whisk until the glaze is glossy and smooth. This glaze will coat the cake like a silk curtain, enhancing both flavor and presentation.
- Glaze the cake by pouring the glaze over the cooled cake, letting it drip down the sides. The glaze should flow like molten chocolate, covering every crevice. Use a spatula to spread evenly if needed. The final result should be a glossy, chocolatey masterpiece.
- Let the glaze set for 10 minutes before slicing. This ensures a clean cut and a stable surface. The glaze will firm slightly, creating a satisfying snap when you cut through it. The cake is now ready for the grand unveiling.
- Serve and enjoy with a cup of your favorite coffee or a splash of espresso for an extra kick. The cake’s rich, chocolatey flavor pairs perfectly with the bitter notes of coffee. If you’re feeling adventurous, drizzle a little espresso on top before serving for an extra depth of flavor.
- Optional final touch—sprinkle a pinch of sea salt on top of the glaze before it sets. The salt enhances the chocolate’s sweetness and creates a subtle contrast. This simple addition can transform the cake from good to unforgettable. It’s a small step that delivers a big payoff.
That’s it— you did it. But hold on, I’ve got a few more tricks that’ll take this to another level.
Insider Tricks for Flawless Results
The Temperature Rule Nobody Follows
Many bakers think room temperature is enough for butter and eggs, but this recipe benefits from slightly cooler ingredients. Chill the butter for 10 minutes before melting; this prevents the glaze from becoming too runny. Likewise, let the eggs sit at room temperature for 20 minutes to ensure a smooth batter. These small adjustments create a more stable emulsion, leading to a better crumb and glaze.
Why Your Nose Knows Best
Before you bake, sniff the batter. The scent of coffee and chocolate should be unmistakable. If the aroma feels weak, it might indicate the coffee was too weak or the chocolate wasn’t fully melted. Trust your nose; it’s your most reliable quality control tool. A strong aroma guarantees a rich flavor profile in the finished cake.
The 5‑Minute Rest That Changes Everything
After baking, let the cake rest in the pan for 10 minutes before transferring it to a wire rack. This short rest allows the cake to set, preventing it from cracking when you remove the parchment. Some bakers skip this step, leading to a fragile cake that tears when you try to slice it. The rest is a simple, game‑changing move.
Keep the Glaze Cool Until You’re Ready
Once the glaze is prepared, let it chill in the fridge for 15 minutes before pouring. This ensures it’s thick enough to coat the cake without running off the sides. If you pour a too‑liquid glaze, it will pool at the bottom, leaving the top thin. A slightly thicker glaze also creates a better visual contrast.
Use a Parchment‑Paper Extension
When lining your pan, extend the parchment paper up the sides. This extra margin makes it easier to lift the cake out of the pan after baking, especially if it’s still slightly warm. It also reduces the risk of sticking, which can ruin the cake’s shape. A simple parchment trick that saves you from a messy cleanup.
Let the Cake Rest Before Cutting
After glazing, wait at least 10 minutes before slicing. The glaze will set, ensuring clean cuts and preventing it from smearing on the knife. Cutting too soon can result in a sticky mess that ruins the presentation. Patience pays off with a cake that looks as good as it tastes.
Creative Twists and Variations
This recipe is a playground. Here are some of my favorite ways to switch things up:
Mocha Madness
Swap the coffee for a shot of cold espresso and add a tablespoon of instant espresso powder to the batter. The result is a mocha‑infused cake with a subtle bitterness that balances the sweetness. Perfect for coffee lovers who want a deeper flavor profile.
Nutty Delight
Fold in ½ cup of chopped toasted walnuts or pecans into the batter before baking. The nuts add crunch and a buttery undertone that complements the chocolate. Sprinkle extra chopped nuts on top of the glaze for an extra textural layer.
Spiced Surprise
Add ½ teaspoon of cinnamon and a pinch of nutmeg to the dry mix. The warm spices give the cake a cozy, autumnal vibe. This version pairs wonderfully with a splash of bourbon or a dash of espresso for a sophisticated twist.
Caramel Swirl
Drizzle caramel sauce over the glaze before it sets. The sweet caramel contrasts beautifully with the chocolate, creating a layered flavor experience. This variation is perfect for dessert parties where you want to impress with a visual and taste upgrade.
Vegan Version
Replace buttermilk with coconut milk, vegetable oil with melted coconut oil, and eggs with flaxseed meal. Use a vegan chocolate bar for the glaze and substitute powdered sugar with a plant‑based alternative. The result is a rich, fudgy cake that’s entirely plant‑based.
Cheesecake Fusion
Layer a thin slice of cream cheese frosting between the cake layers before glazing. The tangy cream cheese balances the chocolate’s richness. This fusion creates a dessert that feels like a decadent chocolate‑cheesecake hybrid.
Minty Fresh
Add 1 teaspoon of peppermint extract to the glaze and sprinkle crushed mint candies on top. The mint provides a refreshing contrast to the deep chocolate flavor. Serve with a chilled glass of sparkling water for a refreshing finish.
Storing and Bringing It Back to Life
Fridge Storage
Wrap the glazed cake tightly in plastic wrap and store in the refrigerator for up to 5 days. The wrap prevents the cake from drying out and preserves the glaze’s shine. When you’re ready to serve, let it sit at room temperature for 10 minutes to soften slightly.
Freezer Friendly
Wrap the cake in parchment paper, then in a second layer of foil before freezing. It will stay fresh for up to 3 months. When thawing, let the cake sit at room temperature for 30 minutes; this restores the cake’s moisture and prevents a soggy texture.
Best Reheating Method
To reheat, preheat your oven to 300°F (150°C) and bake the cake for 10 minutes. If the glaze has hardened, a brief dip in a warm water bath can help it regain its silky texture. A tiny splash of water before reheating steams back the cake, keeping it moist and delicious.