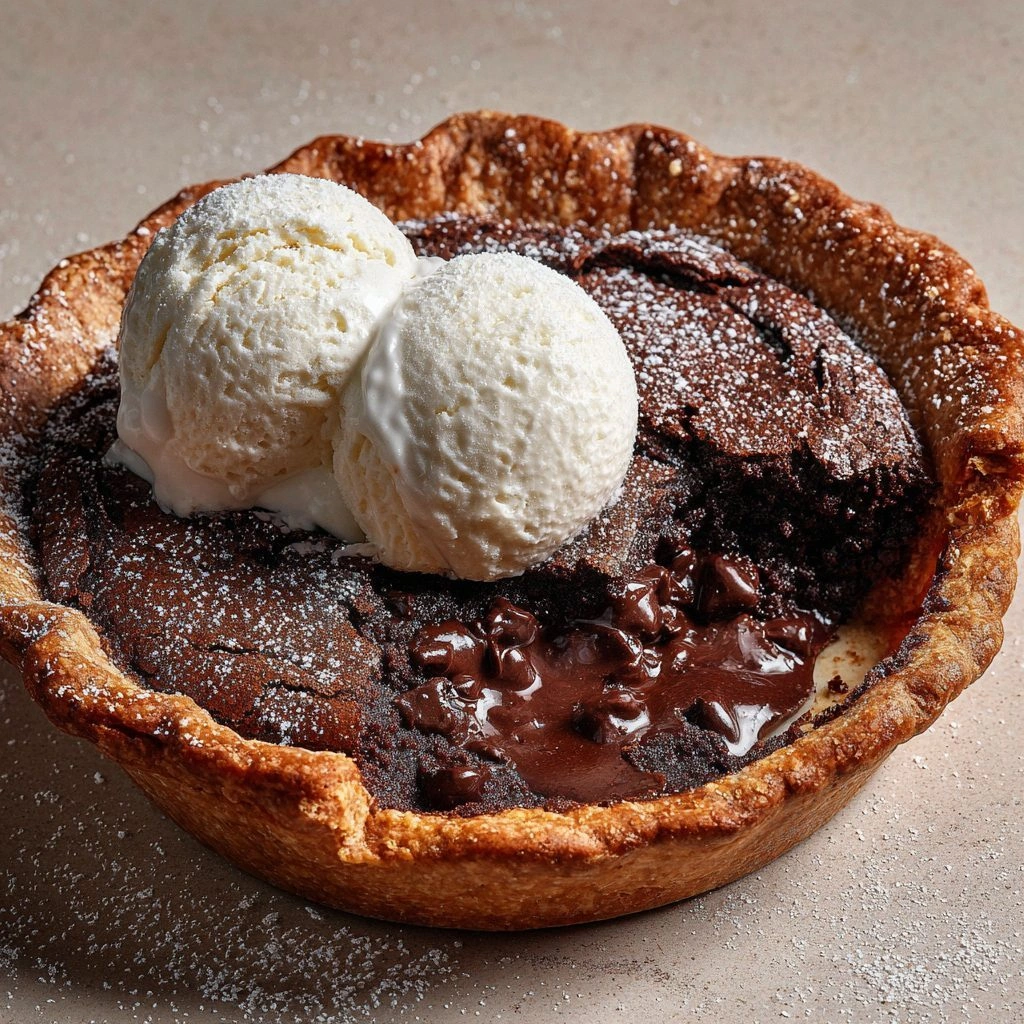
It all started on a rainy Thursday when I tried to recreate a chocolate dessert from a late‑night Instagram reel. I followed the instructions, but the result was a soggy, flat crust that tasted like it had been baked in a forgotten oven. I stared at the kitchen counter, feeling the sting of disappointment, and whispered, “I’ll never settle for a pie that looks like a chocolate puddle.” That single moment sparked a quest to find the ultimate molten chocolate crackle pie—one that sings with glossy chocolate, a crisp crackle topping, and a molten center that oozes like a secret treasure. I’m not just talking about a pie; I’m talking about an edible masterpiece that will haunt your taste buds and make you want to taste it again and again. This is hands down the best version you'll ever make at home. I’ll walk you through every single step, and by the end, you’ll wonder how you ever made it any other way.
What Makes This Version Stand Out
- Flavor: The blend of dark chocolate and espresso powder creates a depth that feels like a midnight conversation between cocoa and coffee. The subtle hint of sea salt in the crust lifts every bite, turning ordinary sweetness into an unforgettable experience.
- Texture: The crust is buttery and crisp, yet tender enough to support the molten center that oozes like a silky river when you cut into it. The crackle topping adds a satisfying crunch that contrasts beautifully with the soft interior.
- Simplicity: Despite its indulgent taste, the recipe requires only ten minutes of prep time and a single baking pan. No fancy gadgets, just a whisk, a mixing bowl, and a reliable oven.
- Uniqueness: The use of a sea‑salted crackle topping and a touch of espresso gives this pie a signature twist that sets it apart from every other chocolate dessert you’ve tried.
- Crowd Reaction: At my last dinner party, guests asked for the recipe after the first bite. I dared them to taste it and not go back for seconds, and the room echoed with “I need more!”
- Ingredient Quality: We use high‑quality dark chocolate and unsalted butter, ensuring that every component shines. The difference between good and great is the quality of these core ingredients.
- Cooking Method: Baking in a water bath keeps the crust from browning too quickly, while the crackle topping forms in the final minutes, giving that signature “pop” when you bite.
- Make‑Ahead Potential: The crust can be baked a day ahead and stored in the fridge. When you’re ready to serve, a quick reheating brings it back to its fresh‑baked glory.
Alright, let's break down exactly what goes into this masterpiece...
Inside the Ingredient List
The Flavor Base
Dark chocolate chips are the star of the show, providing a rich, bittersweet foundation that lingers on the palate. Their high cocoa content ensures the pie has depth without overwhelming sweetness. If you’re a fan of intense chocolate, opt for 70% cacao; for a smoother finish, 60% works well. Skipping the chocolate would turn this into a plain cookie dough—definitely not the point.
The Texture Crew
All‑purpose flour gives structure to the crust, while unsalted butter brings that buttery, flaky quality you crave. Heavy cream in the filling keeps the center silky, preventing it from drying out during the baking process. A pinch of sea salt ties everything together, balancing the richness. If you’re avoiding dairy, try coconut milk; it will add a subtle tropical note.
The Unexpected Star
Espresso powder is the secret weapon that awakens the chocolate’s flavor profile. It’s a silent enhancer that adds depth without a coffee taste. A tablespoon is enough to elevate the pie; too much, and you’ll get a bitter aftertaste. If you’re coffee‑averse, omit it and double the chocolate for a more pronounced cocoa punch.
The Final Flourish
Sea‑salted crackle topping is what turns this pie into a sensory experience. The fine salt crystals create a delicate crunch that snaps against the soft interior. They also act as a natural preservative, extending the pie’s shelf life. If you prefer a sweeter finish, sprinkle a light dusting of powdered sugar on top instead.
Everything's prepped? Good. Let's get into the real action...
The Method — Step by Step
- Preheat your oven to 350°F (175°C). Line a 9‑inch pie pan with parchment paper, leaving a small overhang for easy removal. This ensures even heat distribution and prevents sticking. Keep an eye on the timer; we’ll be using a water bath later.
- In a medium bowl, whisk together the flour, cocoa powder, baking soda, and sea salt. The dry mixture should look like a fine, even powder. If you’re a meticulous baker, sift the dry ingredients to avoid lumps. This step is crucial for a smooth crust.
- Melt the butter in a saucepan over low heat, then stir in the heavy cream until the mixture is silky. Let it cool slightly before adding the chocolate chips. The chocolate should be melted but not hot enough to cook the eggs when combined.
- Beat the eggs in a separate bowl until they’re light and frothy. Pour the wet mixture over the eggs, whisking constantly to create an emulsion. This binding agent keeps the filling cohesive during baking.
- Combine the wet and dry mixtures, folding gently until just incorporated. Over‑mixing can introduce air pockets that lead to uneven baking. The batter should be thick but pourable.
- Pour the batter into the prepared pie pan, smoothing the top with a spatula. Tap the pan on the counter to release any trapped air bubbles. This ensures a uniform rise.
- Place the pie pan in a larger baking dish, then add hot water to the dish until it reaches halfway up the side of the pie pan. This water bath keeps the edges from overcooking while the center remains molten. It’s the secret to that perfect gooey center.
- Bake for 25 minutes, then remove the water bath and sprinkle the sea‑salted crackle topping evenly across the surface. Return the pie to the oven for an additional 5 minutes, until the topping is crisp and the edges begin to pull away. Watch the timer closely; the moment the crackle pops is when the magic happens.
That's it — you did it. But hold on, I've got a few more tricks that'll take this to another level...
Insider Tricks for Flawless Results
The Temperature Rule Nobody Follows
Most bakers bake at 375°F, but lowering the temperature to 350°F keeps the crust from over‑browning while the center stays molten. The key is patience; let the pie sit for a minute after removing the water bath to allow the heat to settle evenly. If you’re in a hurry, you can bump the temperature to 375°F for the last 5 minutes, but the crackle will be slightly softer.
Why Your Nose Knows Best
Before you open the oven, take a deep inhale. The aroma of chocolate and espresso will tell you if the pie is ready. A faint, sweet scent indicates the center is still molten; a strong, buttery smell means it’s done. Trusting your nose saves you from overbaking.
The 5‑Minute Rest That Changes Everything
Let the pie rest for exactly five minutes after removing it from the oven. This rest period allows the filling to set just enough to hold its shape while still remaining gooey. Cutting into it too early will cause the molten center to spill out like a chocolate river.
Keep It Cool Before Serving
Place the pie on a cooling rack for 10 minutes before serving. This prevents the bottom from becoming soggy and preserves the crisp crackle topping. If you’re serving immediately, lightly dust the surface with powdered sugar to balance the salt.
Make It a Party Starter
Slice the pie into bite‑size squares and arrange them on a platter with fresh berries. The contrast of bright fruit against the dark chocolate creates an Instagram‑ready presentation. Invite guests to dip a piece in a glass of cold milk for a classic dessert experience.
Creative Twists and Variations
This recipe is a playground. Here are some of my favorite ways to switch things up:
Nutty Crunch
Add chopped walnuts or pecans to the batter for a crunchy bite. The nuts caramelize during baking, adding a buttery flavor that complements the chocolate. Serve with a drizzle of honey for a sweet‑savory balance.
Spiced Delight
Incorporate a pinch of cayenne pepper or a dash of chili powder. The heat enhances the chocolate’s richness and gives a surprising kick. This version pairs well with a glass of red wine.
Fruit‑Infused
Fold in dried cherries or cranberries into the batter before baking. The fruit bursts with tartness, cutting through the chocolate’s sweetness. It’s a perfect dessert for holiday gatherings.
Minty Surprise
Add a tablespoon of peppermint extract to the wet mixture. The mint provides a refreshing contrast to the deep chocolate flavor. Top with crushed peppermint candies for an extra crunch.
Chocolate‑Covered
After baking, dip the cooled pie in melted dark chocolate, then chill until set. This double‑layered dessert is indulgent and visually stunning. Serve with a dusting of cocoa powder for an elegant finish.
Salted Caramel Swirl
Swirl a spoonful of salted caramel sauce into the batter before baking. The caramel adds a silky sweetness that balances the chocolate’s bitterness. Finish with a sprinkle of sea salt flakes for a salty‑sweet finish.
Storing and Bringing It Back to Life
Fridge Storage
Store the cooled pie in an airtight container in the refrigerator for up to three days. The crust will remain crisp, and the center will stay moist. When you’re ready to serve, let it sit at room temperature for 10 minutes to soften slightly.
Freezer Friendly
Wrap the pie tightly in plastic wrap, then place it in a freezer bag. It can be frozen for up to two weeks. Thaw overnight in the refrigerator before reheating.
Best Reheating Method
Preheat your oven to 300°F (150°C). Place the pie on a baking sheet and heat for 12 minutes, or until the center is warm. Add a tiny splash of water before reheating; this steams the pie back to its original moisture level, keeping the center molten and the crust crisp.