Picture this: I was standing in my kitchen, a half‑baked batch of battered onion rings hanging in the air, when the doorbell rang. The housemate, a self‑proclaimed crunch connoisseur, demanded instant, golden perfection. I stared at the air fryer, wondering if it could save the night. That moment sparked a midnight experiment that turned a kitchen mishap into a crispy revelation. I swear the aroma was so addictive, even the cat stopped me from stealing a ring.
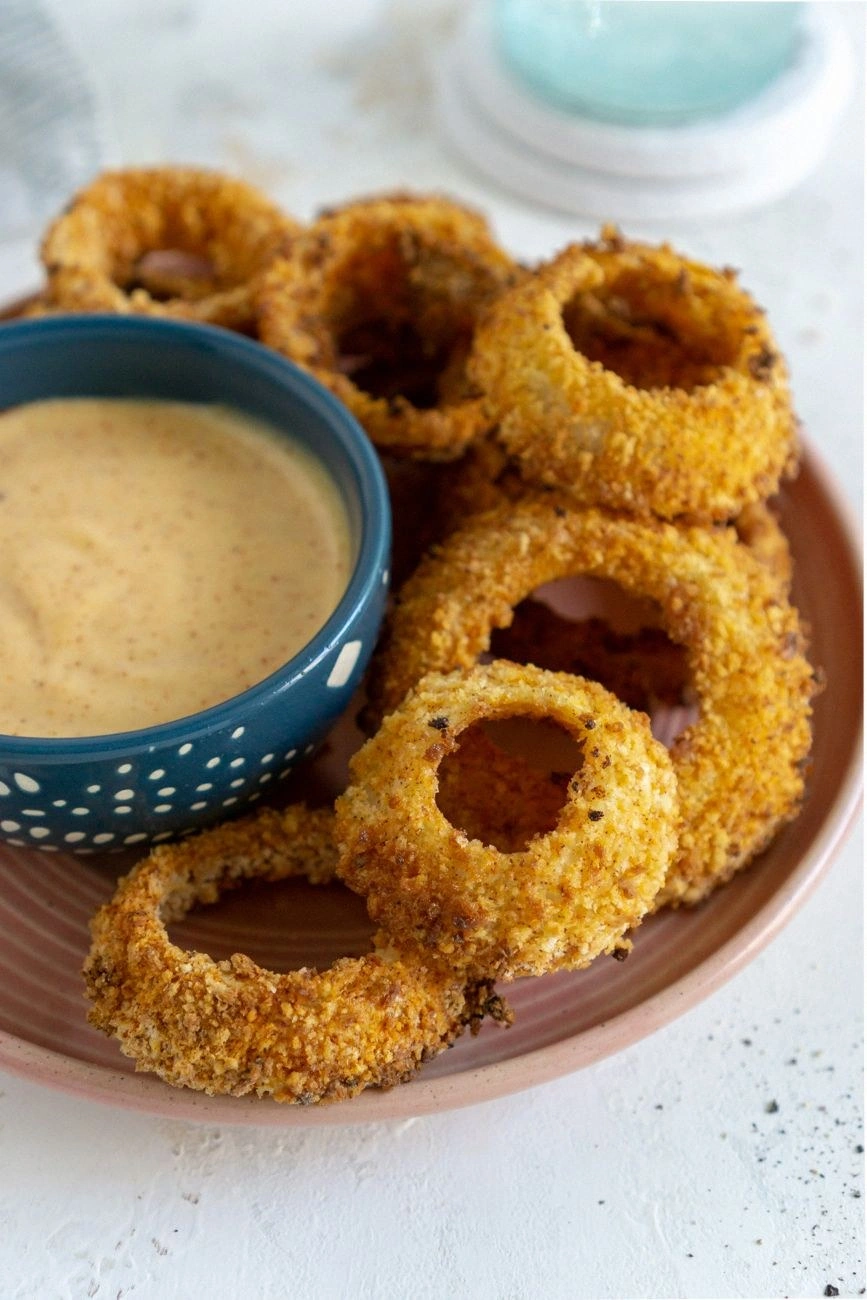
The scent of caramelized onions danced through the room, mingling with the faint scent of paprika and garlic. My ears caught the rhythmic hiss of the air fryer as it spun its invisible wind. The heat kissed the onion slices, turning their edges to a golden amber that seemed to promise crunch. Every bite delivered a burst of sweet onion followed by a subtle kick from the cayenne, wrapped in a buttery, panko shell. The texture was a perfect paradox—light as a feather on the inside, yet firm enough to resist the slightest bite.
What makes this version stand out? It’s the marriage of a simple batter and a hyper‑crisp coating that defies the usual soggy trap. I swapped traditional flour for a 50/50 blend of all‑purpose flour and panko, giving it that signature crunch. The batter is leavened with baking powder, ensuring the rings puff just enough to stay airy inside. A dash of paprika turns the color from dull to a mouth‑watering ruby hue, while the garlic powder adds depth without overpowering. The result? A dish that feels like a gourmet take‑out but costs less than a coffee and is ready in under 45 minutes.
And here’s the kicker: I discovered that a quick splash of water on the onion slices before battering creates a vapor layer that locks in moisture. That tiny trick keeps the rings tender inside while the exterior turns to a crisp, golden shell. I dare you to taste this and not go back for seconds. Picture yourself pulling this out of the air fryer, the whole kitchen smelling incredible, and serving it to a crowd that can’t stop raving. Let me walk you through every single step — by the end, you'll wonder how you ever made it any other way.
What Makes This Version Stand Out
- Crunch: The panko coating delivers a texture that shatters like thin ice with each bite, a texture that most battered versions fail to achieve. The airy batter keeps the interior light, preventing the dreaded soggy middle. Together, they create a harmonious contrast that makes every ring a triumph.
- Flavor: The paprika and garlic powder infusion gives the rings a smoky depth that pairs beautifully with the sweet onion. A whisper of cayenne adds a subtle heat that lingers, keeping the flavor profile balanced and memorable. This combination turns a simple snack into a culinary statement.
- Speed: An air fryer eliminates the need for deep‑frying, cutting prep time by half while still achieving a golden crust. The entire process, from slicing to serving, takes less than an hour, making it ideal for weeknight cravings. No greasy mess, no lingering odor, just pure satisfaction.
- Health: Using olive oil spray instead of drowning the rings in oil keeps the calorie count down while still providing a crisp finish. The batter’s lightness means you can indulge without the guilt that comes with traditional fried foods. It’s a win‑win for taste and wellness.
- Make‑ahead: The batter and coating can be prepped ahead of time, and the rings can be frozen before frying. When you’re ready to serve, simply pop them in the air fryer for a few minutes, and they’re ready to devour. This flexibility makes it a go-to for busy households.
- Versatility: While the classic version is unbeatable, the base recipe adapts effortlessly to a variety of flavor twists. Whether you’re craving a spicy kick or a sweet glaze, the foundation remains solid. The adaptability is why this recipe has become a staple in my pantry.
Inside the Ingredient List
The Flavor Base
All-purpose flour is the backbone of the batter, providing structure and a neutral canvas for the spices. It absorbs moisture without becoming gummy, ensuring the rings stay airy. If you’re watching sodium, you can replace it with a low-sodium flour blend, but be sure to keep the ratio consistent. Skipping the flour will result in a sticky, uneven coating that loses its crispness.
Panko breadcrumbs add the signature crunch that elevates the texture. Their airy, flaky nature creates a light, crackling exterior that contrasts beautifully with the tender onion. Using panko over traditional breadcrumbs is essential; regular breadcrumbs tend to clump and produce a denser crust. For a gluten-free version, simply swap in a certified gluten-free panko.
Paprika brings a smoky undertone and a vibrant hue that makes the rings visually appealing. It also balances the sweetness of the onion, preventing the dish from becoming overly sugary. A pinch of smoked paprika can deepen the flavor profile, while a regular paprika keeps it bright and fresh. The color change is a subtle indicator that the batter has absorbed the spices.
The Texture Crew
Garlic powder adds depth without the harshness of fresh garlic. It’s evenly distributed throughout the batter, giving each bite a subtle, savory note. If you prefer a fresher garlic taste, you can mince a clove and fold it into the batter, but this may create uneven seasoning.
Cayenne pepper introduces a gentle heat that lingers on the palate. It’s a strategic addition that prevents the dish from feeling flat, especially when paired with the sweet onion. Adjust the amount to suit your tolerance; a smaller dose will still provide a pleasant kick.
Kosher salt is the final seasoning touch that enhances every other ingredient. It balances the sweetness and brings out the natural umami of the onion. Be careful not to over-salt, as the salt also affects the batter’s texture. A light dusting is all you need to achieve the ideal flavor.
The Unexpected Star
The sweet onion is the star that holds everything together. Its natural sugars caramelize during frying, creating a sweet contrast to the savory coating. Choosing a high-quality onion, like a Vidalia or a sweet variety, can elevate the dish to new heights. A fresh onion also ensures a crisp texture that resists sogginess.
The onion’s thickness matters; thin slices tend to become mushy, while thick rings hold their shape better. Aim for slices about 1/2 inch thick for the best balance of crunch and tenderness. If you’re using a mandoline, set it to a consistent thickness to avoid uneven cooking.
The water splash trick works by creating a steam layer that locks moisture inside the onion. This technique keeps the rings from drying out, ensuring a tender interior. It also reduces the likelihood of the coating pulling away from the onion during frying.
The Final Flourish
Olive oil spray is the secret to a crispy exterior without excess oil. It coats the batter evenly, allowing the heat to sear the surface quickly. Using a spray instead of dipping the rings in oil prevents a greasy finish, keeping the dish lighter.
Spicy mayo adds a creamy, spicy finish that balances the savory crunch. It’s the perfect dipping sauce that turns the rings into a crowd‑pleasing snack. A simple mix of mayo and sriracha works well, but feel free to experiment with different hot sauces.
The final touch is the serving presentation. Arrange the rings on a parchment-lined tray for an elegant look, or pile them in a bowl for a casual vibe. A drizzle of spicy mayo over the top creates a glossy finish that invites dipping. The presentation is as important as the flavor in making this dish unforgettable.
Everything’s prepped? Good. Let’s get into the real action.
The Method — Step by Step
- Begin by preheating your air fryer to 400°F (204°C). While the unit heats, slice the sweet onion into 1/2‑inch rings, keeping the layers together for even coating. Pat the rings dry with a paper towel; moisture is the enemy of crispness. This step ensures a clean, dry surface for the batter to adhere to.
- In a shallow bowl, whisk the two eggs until the whites and yolks are fully blended. This creates a smooth base for the coating to cling. The eggs also act as a binder, preventing the batter from falling off during frying.
- Combine flour, panko, paprika, garlic powder, cayenne pepper, kosher salt, and baking powder in a separate bowl. Stir until all ingredients are evenly distributed; a uniform coating is key to consistent flavor. This dry mix is the foundation of the crispy shell.
- Dip each onion ring first into the egg mixture, allowing excess to drip off. Then roll it in the dry mix, pressing gently to ensure a full coating. The double‑dip technique guarantees that the batter adheres firmly, creating a sturdy shell.
- Arrange the coated rings in a single layer in the air fryer basket, making sure they don’t overlap. Overcrowding reduces airflow and can lead to uneven cooking. This step is crucial for achieving that signature crunch.
- Spray the rings lightly with olive oil spray to enhance browning. The oil forms a thin film that crisps the surface without soaking the batter. This step is where the magic happens—watch the rings transform into golden perfection.
- Cook for 10 minutes, then shake the basket to ensure even exposure to the hot air. This movement promotes uniform browning and prevents sticking. The rings should emit a deep golden aroma.
- Reduce the temperature to 380°F (193°C) and cook for an additional 5 minutes. The lower heat allows the interior to finish cooking without burning the exterior. The rings should feel firm and the coating should be crisp.
- Remove the rings and let them rest for 2 minutes on a cooling rack. Resting allows the steam to escape, preserving the crispness. This short pause is the difference between good and unforgettable.
That’s it — you did it. But hold on, I’ve got a few more tricks that will take this to another level. These insider tips are the secret sauce that turns a great dish into a legendary one. Trust me, you’ll want to keep them in your culinary arsenal.
Insider Tricks for Flawless Results
The Temperature Rule Nobody Follows
Air fryer temperatures are often underestimated. A lower temperature can cause the batter to cook too slowly, leading to sogginess. By starting at 400°F and then dropping to 380°F, you allow the exterior to crisp while the interior finishes perfectly. This two‑stage approach is the hallmark of professional chefs.
Why Your Nose Knows Best
Your sense of smell is a reliable indicator of doneness. As the rings cook, the aroma shifts from mild to a rich, toasted scent. When you notice a deep, nutty fragrance, it’s a sign that the coating is caramelizing just right. Trust that instinct; it’s your best friend in the kitchen.
The 5‑Minute Rest That Changes Everything
Letting the rings rest after cooking allows the steam to escape and the crust to firm up. This brief pause is often overlooked, but it prevents the rings from becoming soggy. I’ve seen people skip this step and end up with a chewy texture that ruins the experience.
Keep the Basket Dry
If you notice condensation building up in the basket, it’s a sign that moisture is being trapped. Tilt the basket slightly to drain excess liquid, or add a paper towel at the bottom. This simple maneuver ensures the rings stay crisp.
Add a Final Spritz for Extra Crunch
Right before serving, give the rings a quick spritz of olive oil spray. This step adds a glossy finish and a burst of flavor that enhances the overall experience. It also helps the spicy mayo cling better when you dip.
Creative Twists and Variations
Spicy Sriracha Rings
Swap the spicy mayo with a drizzle of sriracha for a fiery kick. The heat pairs beautifully with the sweet onion, creating a flavor explosion. Serve with a side of cool yogurt dip to balance the heat. This variation is perfect for those who love a bold, spicy bite.
Herb‑Infused Rings
Add dried thyme or rosemary to the dry mix for an earthy undertone. The herbs bring a fragrant aroma that complements the caramelized onion. Sprinkle fresh parsley after frying for a fresh, green finish. This twist elevates the dish into a gourmet appetizer.
Cheesy Crunch
Sprinkle grated Parmesan or cheddar into the dry mix for a savory, melty coating. The cheese melts into the panko, adding a gooey layer that enhances texture. Pair with a creamy ranch dip for a classic comfort food feel. This version is a hit at game nights.
Sweet Cinnamon Rings
Replace cayenne with a pinch of cinnamon for a sweet, aromatic twist. The cinnamon pairs with the natural sweetness of the onion, creating a dessert‑like snack. Dust with powdered sugar for an elegant touch. This version is ideal for brunch or a sweet snack.
Gluten‑Free Delight
Use a gluten-free flour blend and gluten‑free panko to keep the recipe safe for celiac patients. The texture remains the same, ensuring a crispy finish. The flavor profile stays intact, with the same savory crunch. This adaptation proves that gluten-free can still be delicious.
Storing and Bringing It Back to Life
Fridge Storage
Store leftover rings in an airtight container in the refrigerator for up to 3 days. Keep them on a paper towel to absorb moisture and prevent sogginess. When ready to eat, reheat in the oven at 350°F (177°C) for 5 minutes to restore crispness. This method preserves the flavor and texture without the need for oil.
Freezer Friendly
Freeze the rings on a parchment‑lined tray before transferring them to a freezer bag. They stay fresh for up to 2 weeks when sealed properly. When reheating, place them directly in a preheated oven at 400°F (204°C) for 8 minutes. The quick bake restores the original crunch.
Best Reheating Method
The oven is the best choice for reheating; it maintains the crisp exterior while warming the interior. Avoid microwaving, as it turns the rings soggy. A quick splash of water before reheating can create steam that keeps the rings moist inside. This trick is especially useful for larger batches.
Serving Suggestions
Serve the rings hot, accompanied by a trio of dipping sauces—spicy mayo, ranch, and a tangy honey mustard. The combination of creamy, spicy, and sweet sauces offers a flavor spectrum that satisfies all cravings. Arrange the rings in a circular pattern on a platter to create a visually appealing centerpiece. This presentation is perfect for parties or a casual family dinner.
Pair the rings with a cold, crisp beer or a sparkling lemonade for a refreshing contrast. The carbonation cuts through the richness, balancing the palate. If you prefer a non-alcoholic option, try a chilled cucumber mint drink. The coolness complements the heat from the rings, creating a harmonious taste.
For a wholesome twist, serve the rings alongside a fresh green salad with a light vinaigrette. The acidity of the dressing lifts the savory flavor, while the crunch adds a delightful textural contrast. This makes the dish suitable for a light lunch or a sophisticated appetizer.
If you’re hosting a movie night, arrange the rings in a shallow bowl with a drizzle of extra spicy mayo. The dip adds a glossy sheen, making the snack look irresistible. The rings’ crunch will keep the audience engaged between scenes, adding a playful element to the evening.
For a brunch spread, add a side of scrambled eggs and toast. The savory rings pair wonderfully with the richness of the eggs, while the toast provides a comforting base. The combination offers a balanced meal that feels both indulgent and wholesome.
If you want to elevate the experience, sprinkle freshly grated Parmesan over the hot rings. The cheese melts slightly, creating a decadent coating that adds depth. Pair this with a glass of full‑bodied red wine for an elegant, upscale touch. This version is ideal for a dinner party or a special occasion.
Lastly, consider serving the rings on a wooden board with a small dish of spicy mayo. The rustic aesthetic enhances the overall appeal, making the snack feel artisanal. The aroma alone will draw guests in, setting the stage for a memorable culinary experience.
No matter how you choose to serve them, these rings are guaranteed to be a crowd‑pleaser. Their versatility and bold flavor make them an instant favorite. Experiment with different sauces and pairings to keep the dish fresh and exciting. The possibilities are endless, and the results are always delicious.
Now that you’ve seen the full spectrum of possibilities, it’s time to put this recipe into action. Grab your ingredients, set your air fryer, and let the magic begin. The kitchen is yours to conquer, and these onion rings will be your triumphant creation. Enjoy the journey and the results.