I still remember the first time I tasted a pistachio cream stuffed cookie. It was one of those rare moments when the world seems to pause, like the universe decided to hit the mute button on everything except the sensation of buttery dough melting into a river of emerald nutty sweetness. My friend had dared me to try it, claiming it would "ruin all other cookies for life." She wasn't wrong. One bite and I was hooked, hunting for the perfect recipe, only to find most versions were dry, bland, or worse — they leaked their filling like a broken piñata.
Fast forward through three failed batches, one smoke alarm incident, and a very patient dog who cleaned up the floor casualties, and I finally cracked the code. These pistachio cream stuffed cookies are the dessert equivalent of a secret handshake: once you know, you know. The edges crisp like thin caramelized lace, the centers stay soft and chewy, and the pistachio cream core stays locked inside like buried treasure. Picture yourself pulling these out of the oven, the scent of toasted nuts and vanilla swirling through your kitchen like a sweet, nutty fog that makes neighbors suddenly remember your name.
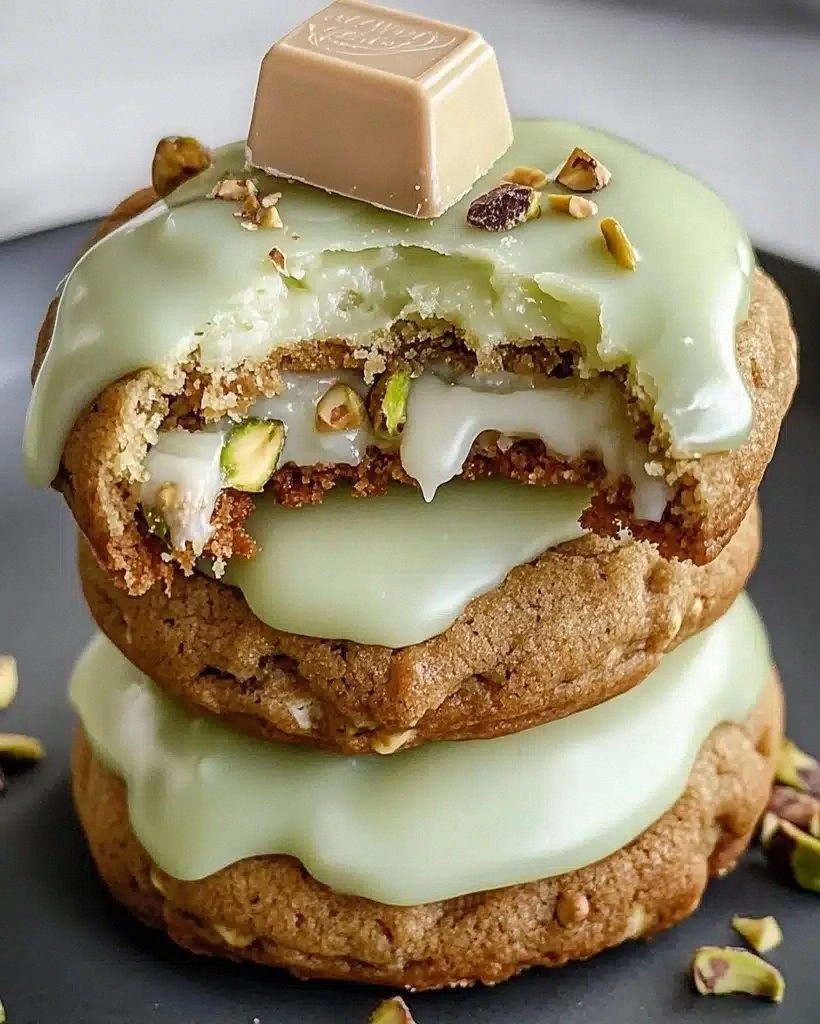
What makes this version different? We're not just sandwiching some spread between two sad cookies. We're engineering a cookie that self-sauces from the inside out, using a technique I borrowed from French pâtisserie and a few tricks I learned from a street vendor in Palermo. The result is a cookie that looks innocent until you break it open and that green ribbon of pistachio lava appears. I dare you to taste one and not go back for seconds. Actually, I double-dog dare you — because I ate half the batch before anyone else got to try it, and I need someone to validate my life choices.
Stay with me here — this is worth it. We're going to brown the butter just enough to smell like hazelnuts, fold in white chocolate chunks that melt into milky pockets, and nestle a cold dollop of pistachio cream inside each dough ball so it bakes into a molten center. Let me walk you through every single step — by the end, you'll wonder how you ever made it any other way.
What Makes This Version Stand Out
- Flavor Bomb: Most recipes rely on plain butter and hope the filling does the heavy lifting. We brown the butter first, creating nutty, toffee notes that make the pistachio taste even greener and more intense. It's like turning the volume knob up on your favorite song.
- Leak-Proof Filling: Nobody wants a cookie that erupts like a poorly filled donut. We freeze tiny scoops of pistachio cream so they stay centered and melt slowly, giving you that molten core without the mess. This is the game-changer.
- Texture Contrast: We're talking crispy edges that shatter like thin ice, a chewy middle that stretches like caramel, and a creamy heart that oozes like warm gianduja. Three textures, one bite — it's a symphony, not a solo.
- One-Bowl Dough: No stand mixer? No problem. This dough comes together with a wooden spoon and a bit of elbow grease. If you've ever struggled with finicky cookie doughs that need planetary alignment to work, you're not alone — and I've got the fix.
- Crowd Psychology: I brought these to a potluck and watched grown adults hover like seagulls, plotting the exact moment they could swoop in for seconds. One guy tried to stash four in his jacket pocket. They disappear faster than free concert tickets.
- Make-Ahead Magic: The dough balls freeze beautifully. Keep a dozen in your freezer and you'll never be more than twelve minutes away from warm, bakery-level cookies. Future you is already thanking present you.
Alright, let's break down exactly what goes into this masterpiece...
Inside the Ingredient List
The Flavor Base
Butter is the canvas, and we're painting with brown. Start with unsalted butter so you control the salt level — trust me, there's a big difference between "seasoned" and "salty." Browning the butter evaporates water and concentrates flavor, leaving behind golden fat and toasty milk solids that taste like shortbread's sophisticated cousin. If you skip this step, your cookies will still be good, but they won't have that haunting depth that makes people close their eyes when they chew. Cool the butter until it's opaque but still pliable; too hot and it'll scramble your eggs, too cold and your dough seizes like day-old fudge.
The Texture Crew
Brown sugar brings molasses notes and chew, while white sugar gives us crisp edges — it's a team effort. Use dark brown sugar if you want a deeper, almost licorice vibe, but light brown is the crowd-pleaser. Eggs bind everything, but they also add steam for lift; I use two large ones at room temperature so they incorporate smoothly. Vanilla extract is the background singer you only notice when it's missing — splurge on the real stuff, not the imitation that tastes like a candle. All-purpose flour gives structure, but the baking soda is the real MVP here; it reacts with the brown sugar's acidity to create lift and those beautiful crackly tops.
The Unexpected Star
Here's where most recipes phone it in. We're using chopped pistachios not just for crunch, but for flavor pockets that bloom in the heat. Toast them first in a dry skillet until they smell like popcorn and start to split — that aroma is your cue they're ready. White chocolate chunks melt into milky veins that contrast the nuttiness, but if you find white chocolate too sweet, swap in good dark chocolate with 60% cacao. The sweetened condensed milk isn't just for the filling; a tablespoon in the dough keeps everything tender for days. And that pistachio cream? Look for one that's mostly nuts and sugar, not the cheap stuff padded with oils. You want the color of a spring meadow, not hospital walls.
The Final Flourish
The melted white chocolate glaze is optional but highly recommended — it photographs like a dream and adds a professional snap. Melt it gently with a teaspoon of neutral oil so it stays glossy, not chalky. A single white chocolate square on top is your telltale sign there's treasure inside; press it in the moment the cookies come out so it adheres but doesn't lose shape. If you can't find pistachio cream, make your own by blitzing equal parts pistachios and sugar with a splash of oil until it looks like peanut butter's fancy cousin. Store-bought is fine, but homemade makes you look like a pastry wizard.
Everything's prepped? Good. Let's get into the real action...
The Method — Step by Step
- Brown the butter first because patience here pays dividends later. Cut the butter into chunks so it melts evenly, then set it over medium heat in a stainless or light-colored pan. Swirl constantly; the foam will subside, the milk solids will drop to the bottom and turn chestnut brown, and the smell will go from buttery to nutty to almost caramel corn. The moment you see dark specks and smell hazelnuts, pour it into a heat-proof bowl to stop the cooking. Let it cool until it's opaque and the consistency of room-temperature peanut butter — this takes about 45 minutes on the counter or 15 in the fridge, stirred every five so it doesn't harden around the edges.
- While the butter cools, line two baking sheets with parchment and scoop 24 teaspoon-size balls of pistachio cream onto a plate. Freeze them solid — at least 30 minutes — so they behave like chocolate chips instead of toothpaste when you fold them into the dough. This is the moment of truth that separates the pros from the amateurs. If you skip the freeze, your filling will smear and vanish like a magic trick, leaving you with pretty but plain cookies.
- Whisk both sugars into the cooled brown butter until the mixture looks like wet sand at low tide. The brown sugar will dissolve slightly, creating a glossy slurry that coats your spoon like slow caramel. Beat in the eggs one at a time, letting each disappear completely before adding the next; this emulsifies the fat and water so your cookies don't separate into greasy puddles. Add vanilla extract and a pinch of salt — the extract will make the whole thing smell like an ice-cream parlor on a summer night.
- In a separate bowl, whisk flour and baking soda so the leavener distributes evenly; clumps of soda taste metallic and will give your cookies leopard spots. Fold the dry into the wet with a spatula, stopping the moment you see no more streaks of flour. The dough will be soft and slightly shiny, like thick frosting that holds peaks. If it feels greasy, your butter was too warm — pop the bowl in the fridge for ten minutes and proceed.
- Fold in chopped pistachios and white chocolate chunks. The nuts should be a mix of dust and pieces so every bite has crunch, and the chocolate should be irregular so some melts into veins and some stays chunky. Don't over-mix; you want streaks of goodies, not uniform gravel. Cover and chill the dough 30 minutes so the flavors meld and the fat firms up — this prevents spread and gives you those thick bakery-style centers.
- Scoop the chilled dough into 24 balls using a medium cookie scoop or two spoons. Flatten each ball slightly and press a frozen pistachio-cream nugget into the center, then fold the dough over and roll gently to seal. The goal is complete coverage; any cracks and the filling will erupt like a tiny volcano. Place them two inches apart on the prepared sheets and return to the freezer for 15 minutes while the oven preheats — this shock of cold dough hitting hot air is what creates those crinkly tops.
- Bake at 350°F (175°C) for 12–14 minutes. The edges should be golden, the centers puffed and slightly underdone — they continue cooking on the sheet. Don't walk away from the stove here; one minute too long and your molten center becomes a chalky pit. The cookies will look puffy when you pull them out and then deflate like a sigh as they cool.
- Cool on the sheet five minutes before transferring to a rack. While warm, drizzle with melted white chocolate and press a white chocolate square on top for that bakery case vibe. Let the glaze set until it snaps when you break a cookie in half. Serve warm for maximum lava flow, or cool completely and store — though I confess, I ate half the batch before anyone else got to try it.
That's it — you did it. But hold on, I've got a few more tricks that'll take this to another level...
Insider Tricks for Flawless Results
The Temperature Rule Nobody Follows
Most recipes tell you to use room-temperature ingredients and then leave out the part where your kitchen might be arctic or tropical. Here's what actually works: butter should be cool enough that when you press it, your finger leaves a shallow dent, not a swimming pool. Eggs straight from the fridge will seize the butter into grainy bits, so let them sit in warm tap water for five minutes. If you forget, crack them into the microwave for eight seconds — any longer and you'll have breakfast instead of cookie dough. The dough itself should feel like chilled play-dough when it hits the oven; if it's greasy or soft, ten minutes in the freezer beats a lifetime of sad, flat cookies.
Why Your Nose Knows Best
Forget timers — your nose is the real kitchen MVP. When you smell toasted nuts and caramel, the cookies are about 90% done. Open the oven, slide a thin spatula under one edge; if it lifts cleanly and the underside is honey-brown, pull them out. Still pale and doughy? Give it two more minutes but watch like a hawk. A friend tried skipping this step once — let's just say it didn't end well, and her smoke alarm now has trust issues.
The 5-Minute Rest That Changes Everything
Once baked, let the cookies sit on the sheet five full minutes before moving. During this time, the residual heat finishes baking the centers and the structure sets so they don't collapse into cookie pancakes. If you rush and lift too early, you'll leave half the cookie behind like a tragic dessert crime scene. If you wait too long, they stick and you'll need a chisel. Five minutes is the sweet spot — enough time to pour a glass of milk and admire your handiwork.
Glaze Like a Pro
Melted white chocolate seizes faster than you can say "Instagram photo." Add a teaspoon of neutral oil (like grapeseed or even refined coconut) per quarter-cup of chocolate. This keeps the glaze fluid and glossy, perfect for those dramatic drizzle shots. If it still thickens, warm it five seconds in the microwave and stir — never more, or you'll scorch it. And if you want that bakery shine, cool the cookies under a desk lamp for ten minutes; the gentle heat sets the glaze without dulling it.
Creative Twists and Variations
This recipe is a playground. Here are some of my favorite ways to switch things up:
Salted Dark Chocolate Version
Swap the white chocolate chunks for 70% dark chocolate and sprinkle flaky sea salt on top right after baking. The bitterness against the sweet pistachio is like a tango on your tongue. Use espresso powder in the dough to amplify the cocoa notes. People who claim they don't like sweets will devour these and ask for the recipe while pretending they're not addicted.
Rose & Pistachio Middle Eastern Vibe
Add a whisper of rose water to the dough — no more than half a teaspoon or you'll feel like you're eating perfume. Fold in chopped dried rose petals with the pistachios for color and a floral pop. The combo transports you straight to a Moroccan souk, minus the haggling. Serve with cardamom tea and watch everyone's eyes glaze over in happiness.
Coconut Dream
Replace half the butter with coconut oil and swap brown sugar for coconut sugar. Fold in toasted coconut flakes instead of white chocolate. The coconut cream version of the filling works here too — just chill it the same way. It's like a tropical vacation in cookie form, and it makes your kitchen smell like a beach bar.
Spiced Orange Winter Edition
Zest an entire orange into the cooled brown butter and add a pinch of cinnamon and cardamom. Use dark chocolate chunks and a filling spiked with a drop of Grand Marnier. These taste like December in a ski lodge, and they pair outrageously well with red wine. Santa would trade a reindeer for these, I'm sure.
Vegan Power Play
Use vegan butter and coconut condensed milk, and swap eggs for 1/4 cup applesauce each. The dough will be slightly softer, so chill it an extra 15 minutes. Choose dairy-free white chocolate that actually melts — some brands stay waxy and sad. The result is so good that omnivores won't notice the difference until you tell them, and then they'll act betrayed even as they reach for another.
Mini Ice-Cream Sandwich Route
Bake the cookies a minute less so they stay soft. Cool completely, then sandwich a small scoop of pistachio gelato between two cookies. Roll the edges in more chopped nuts and freeze until firm. Instant dinner-party showstopper, and you can make a dozen ahead. Just don't tell anyone how easy it was or you'll be drafted for every potluck forever.
Storing and Bringing It Back to Life
Fridge Storage
Store cooled cookies in an airtight container at room temperature for up to five days. Layer them between parchment so the glaze doesn't stick. If your kitchen is hot and humid, slip a slice of bread in the container — it sacrifices its moisture so your cookies stay chewy. Replace the bread when it feels stale. They'll taste fresh-baked on day three, and by day five the flavors actually deepen like a good stew.
Freezer Friendly
Freeze baked cookies on a tray until solid, then transfer to a zip bag with as much air removed as possible. They keep for two months without losing much texture. Thaw at room temp for 20 minutes or give them a 5-minute ride in a 300°F oven to revive that fresh-baked vibe. The filling re-melts beautifully, so you'll still get the molten effect. Pro move: freeze them unbaked instead — they go straight from freezer to oven with only two extra minutes of bake time.
Best Reheating Method
Microwave kills the crisp edges, so use an oven or toaster oven. Preheat to 300°F, place cookies on a sheet, and warm for 5–6 minutes. Add a tiny splash of water to the corner of the tray — it steams back to perfection without making the bottoms soggy. Eat immediately while the center is lava and the edges snap. If you're feeling fancy, reheat just one and pretend you have restraint. I won't tell.